
Quick Start Guide
https://youtu.be/HuTmDyN0_gE
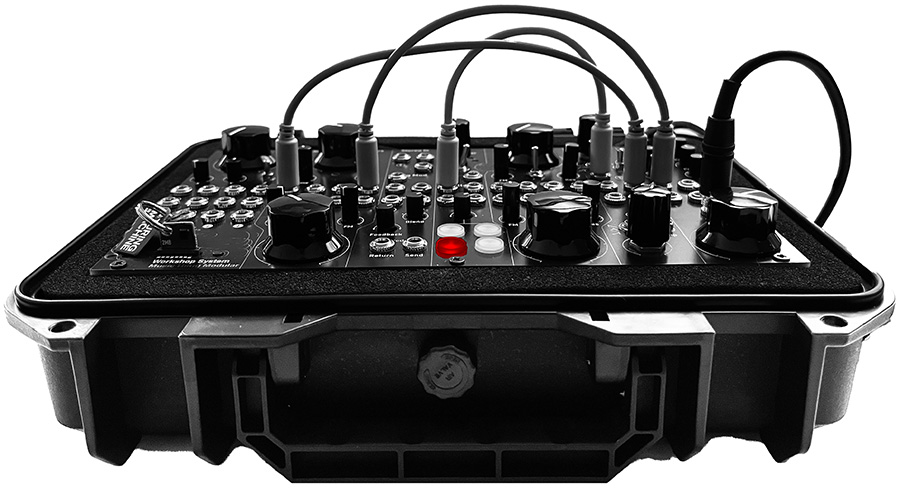
1. Power and Connections ←
To get started, you need a power supply and some patch cables:
Power Supply ←
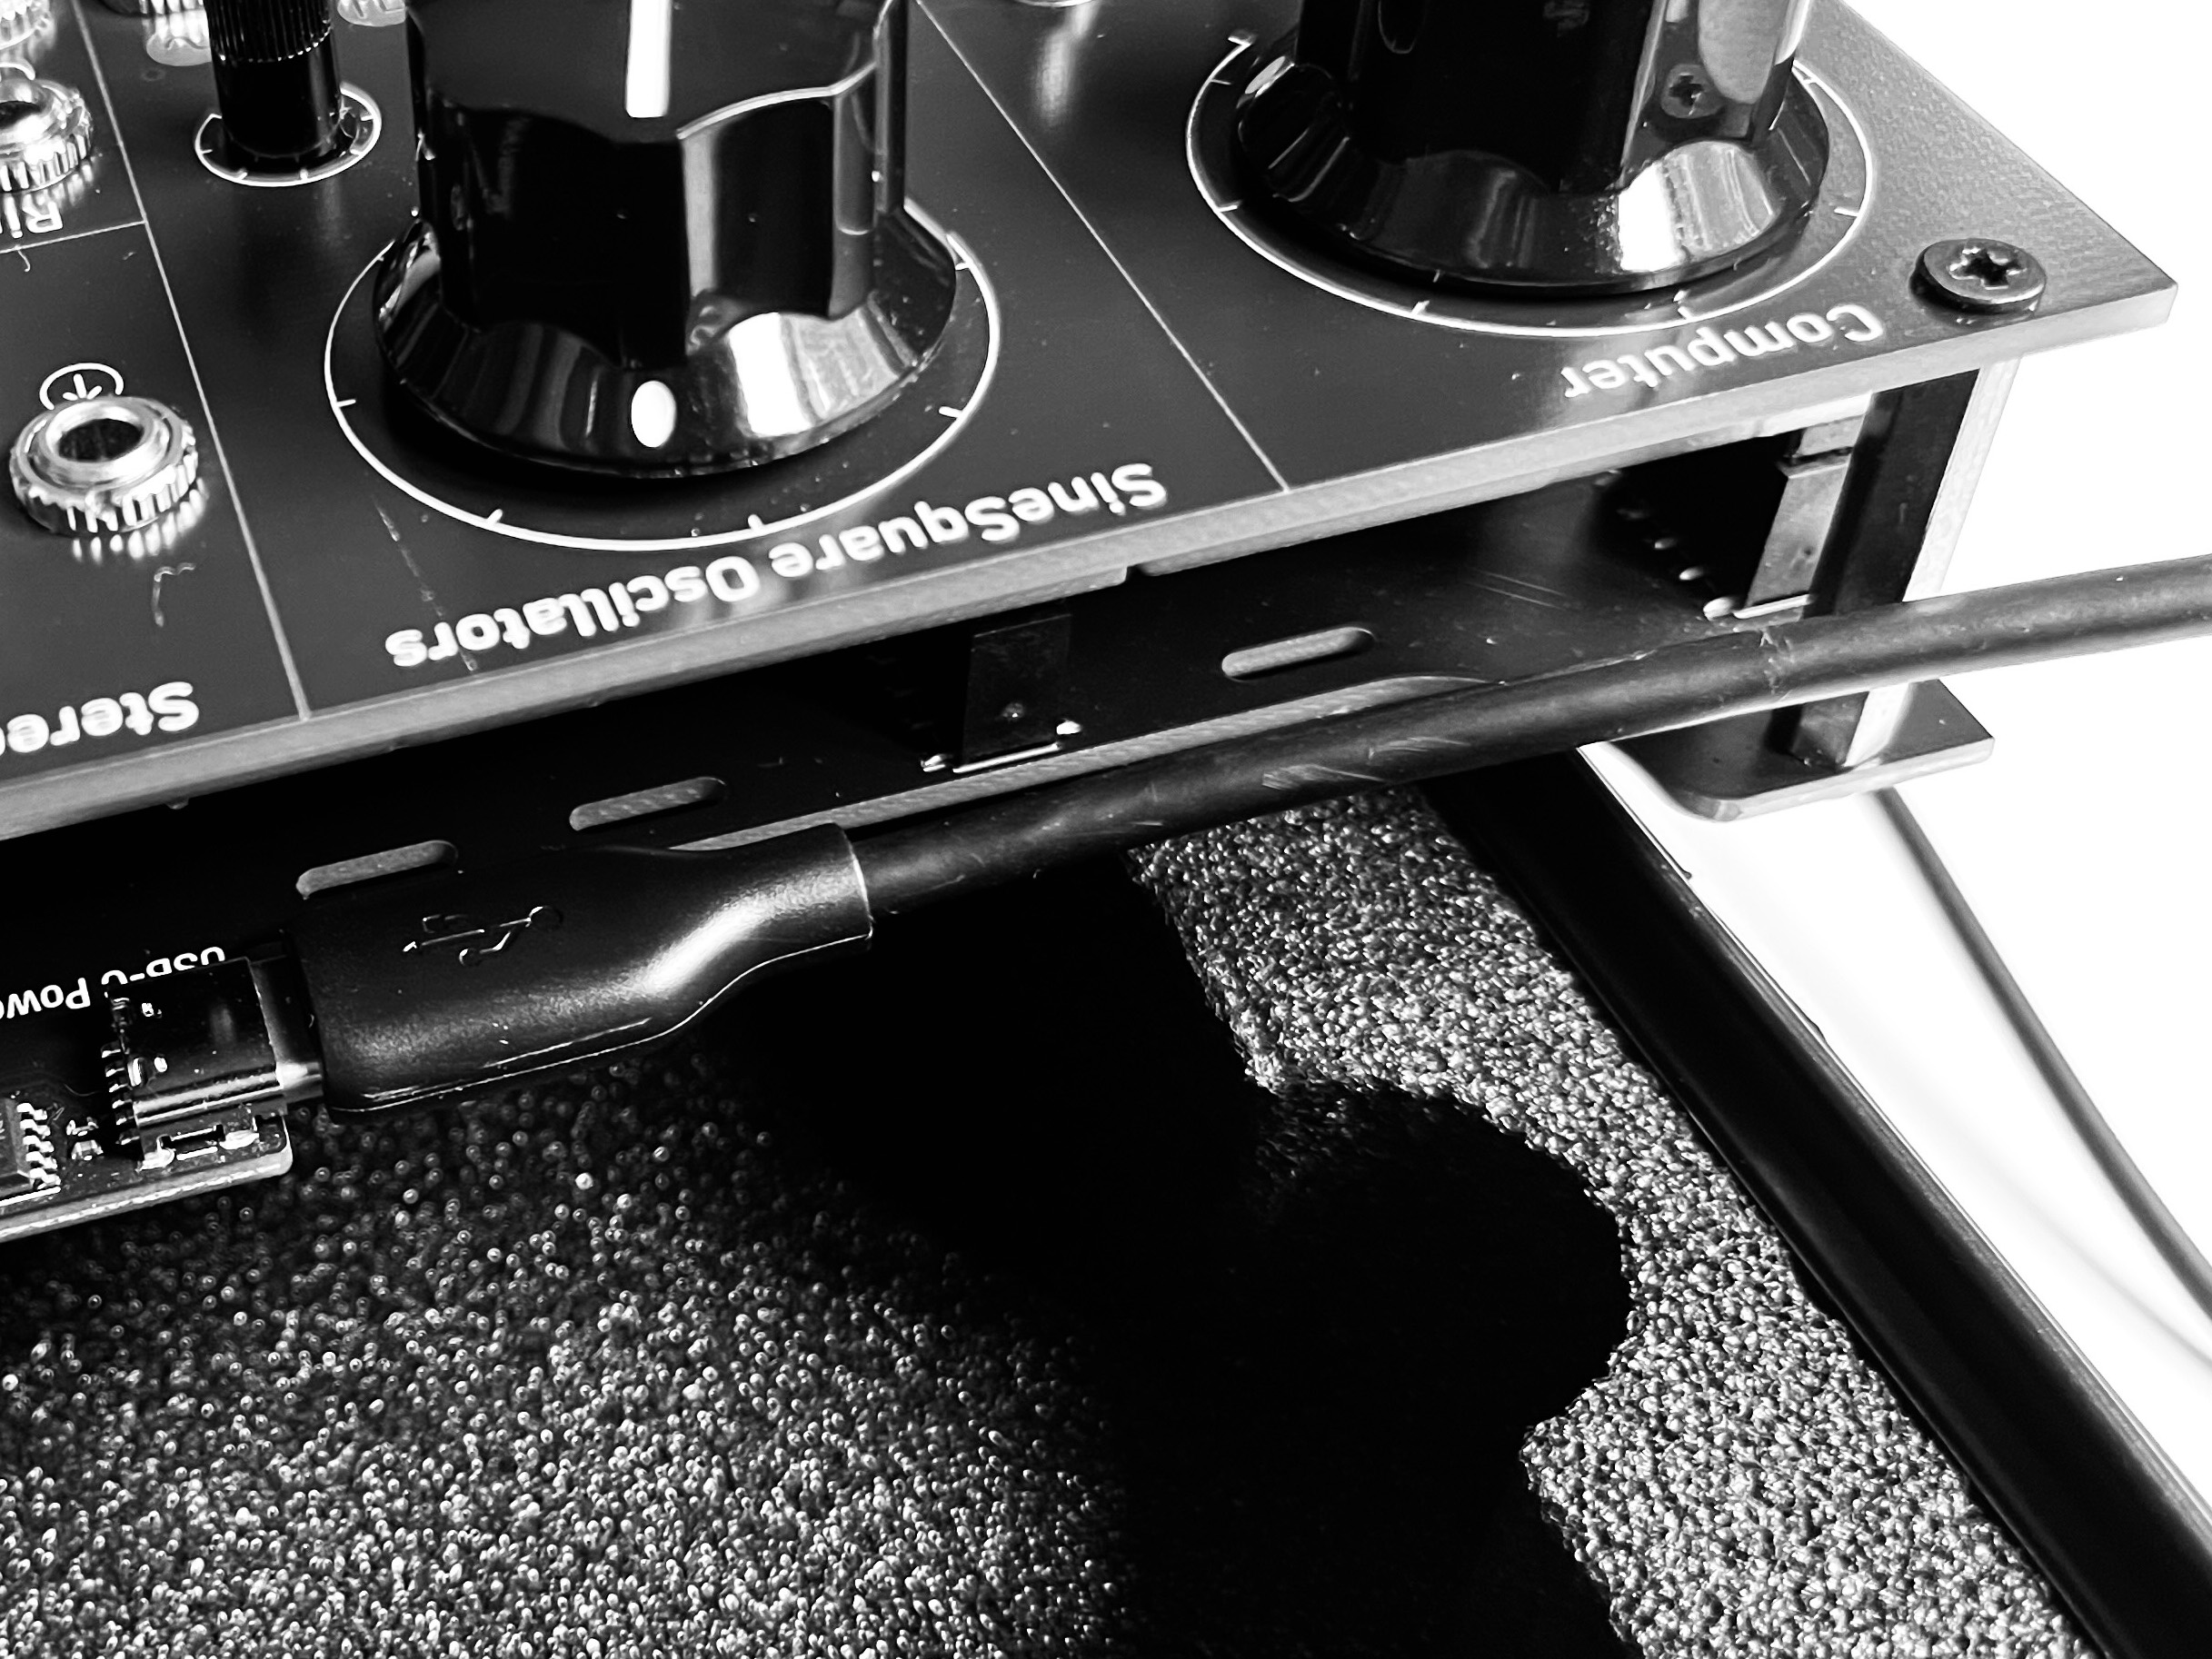
- The workshop system uses USB-C PD power at 15 Volts.
- We recommend the MyVolts Wall Plug to USB PD 65W Adaptor from Thonk, which works well, is very compact and comes with international plug adaptors.
- What WILL work:
- Most laptop-friendly adaptors, and most adaptors of 45 Watts or above can supply 15 Volts.
- If the specifications say the adaptor or battery can supply 15 Volts, it should work.
- The Workshop System requires around 1.0 amps at 15 Volts - Every 15V adaptor I’ve ever seen can deliver this.
- Recent (post 2020) MacBook and other laptop chargers normally work well.
- What WILL NOT work:
- Many smartphone-only adaptors supply 5 Volts or 9 Volts. These will not work.
- Old-style USB-A sockets can not power the Workshop system, even with a USB-A to USB-C cable.
- Early Apple USB-C chargers (2015-2018) did not output 15V so will not work.
- Portable power banks are really fun with the Workshop System. Many small power banks do not provide 15V, but some do. I use this Anker Nano which works well, but there are many variants so check those specs!
- The following UK models have been tested with the Workshop System (late 2024): UGREEN 30W | Anker Nano 30W | Anker GaN 30W | UGREEN 45W | BIUBOTY 45W | CSHARE 30W
- In the USA, the Official Raspberry Pi 45W USB-C Power Supply from Adafruit also provides 15V.
- IKEA’s UK SJÖSS 45W 2-port USB charger works well, and the EU SJÖSS 20W is very cheap and also does 15v. US SJÖSS models don’t have voltages listed on the Website - please let us know if they work for you.
- Some very cheap power supplies from Amazon and AliExpress work, but are electrically noisy - this might be audible when recording or playing over big speakers.
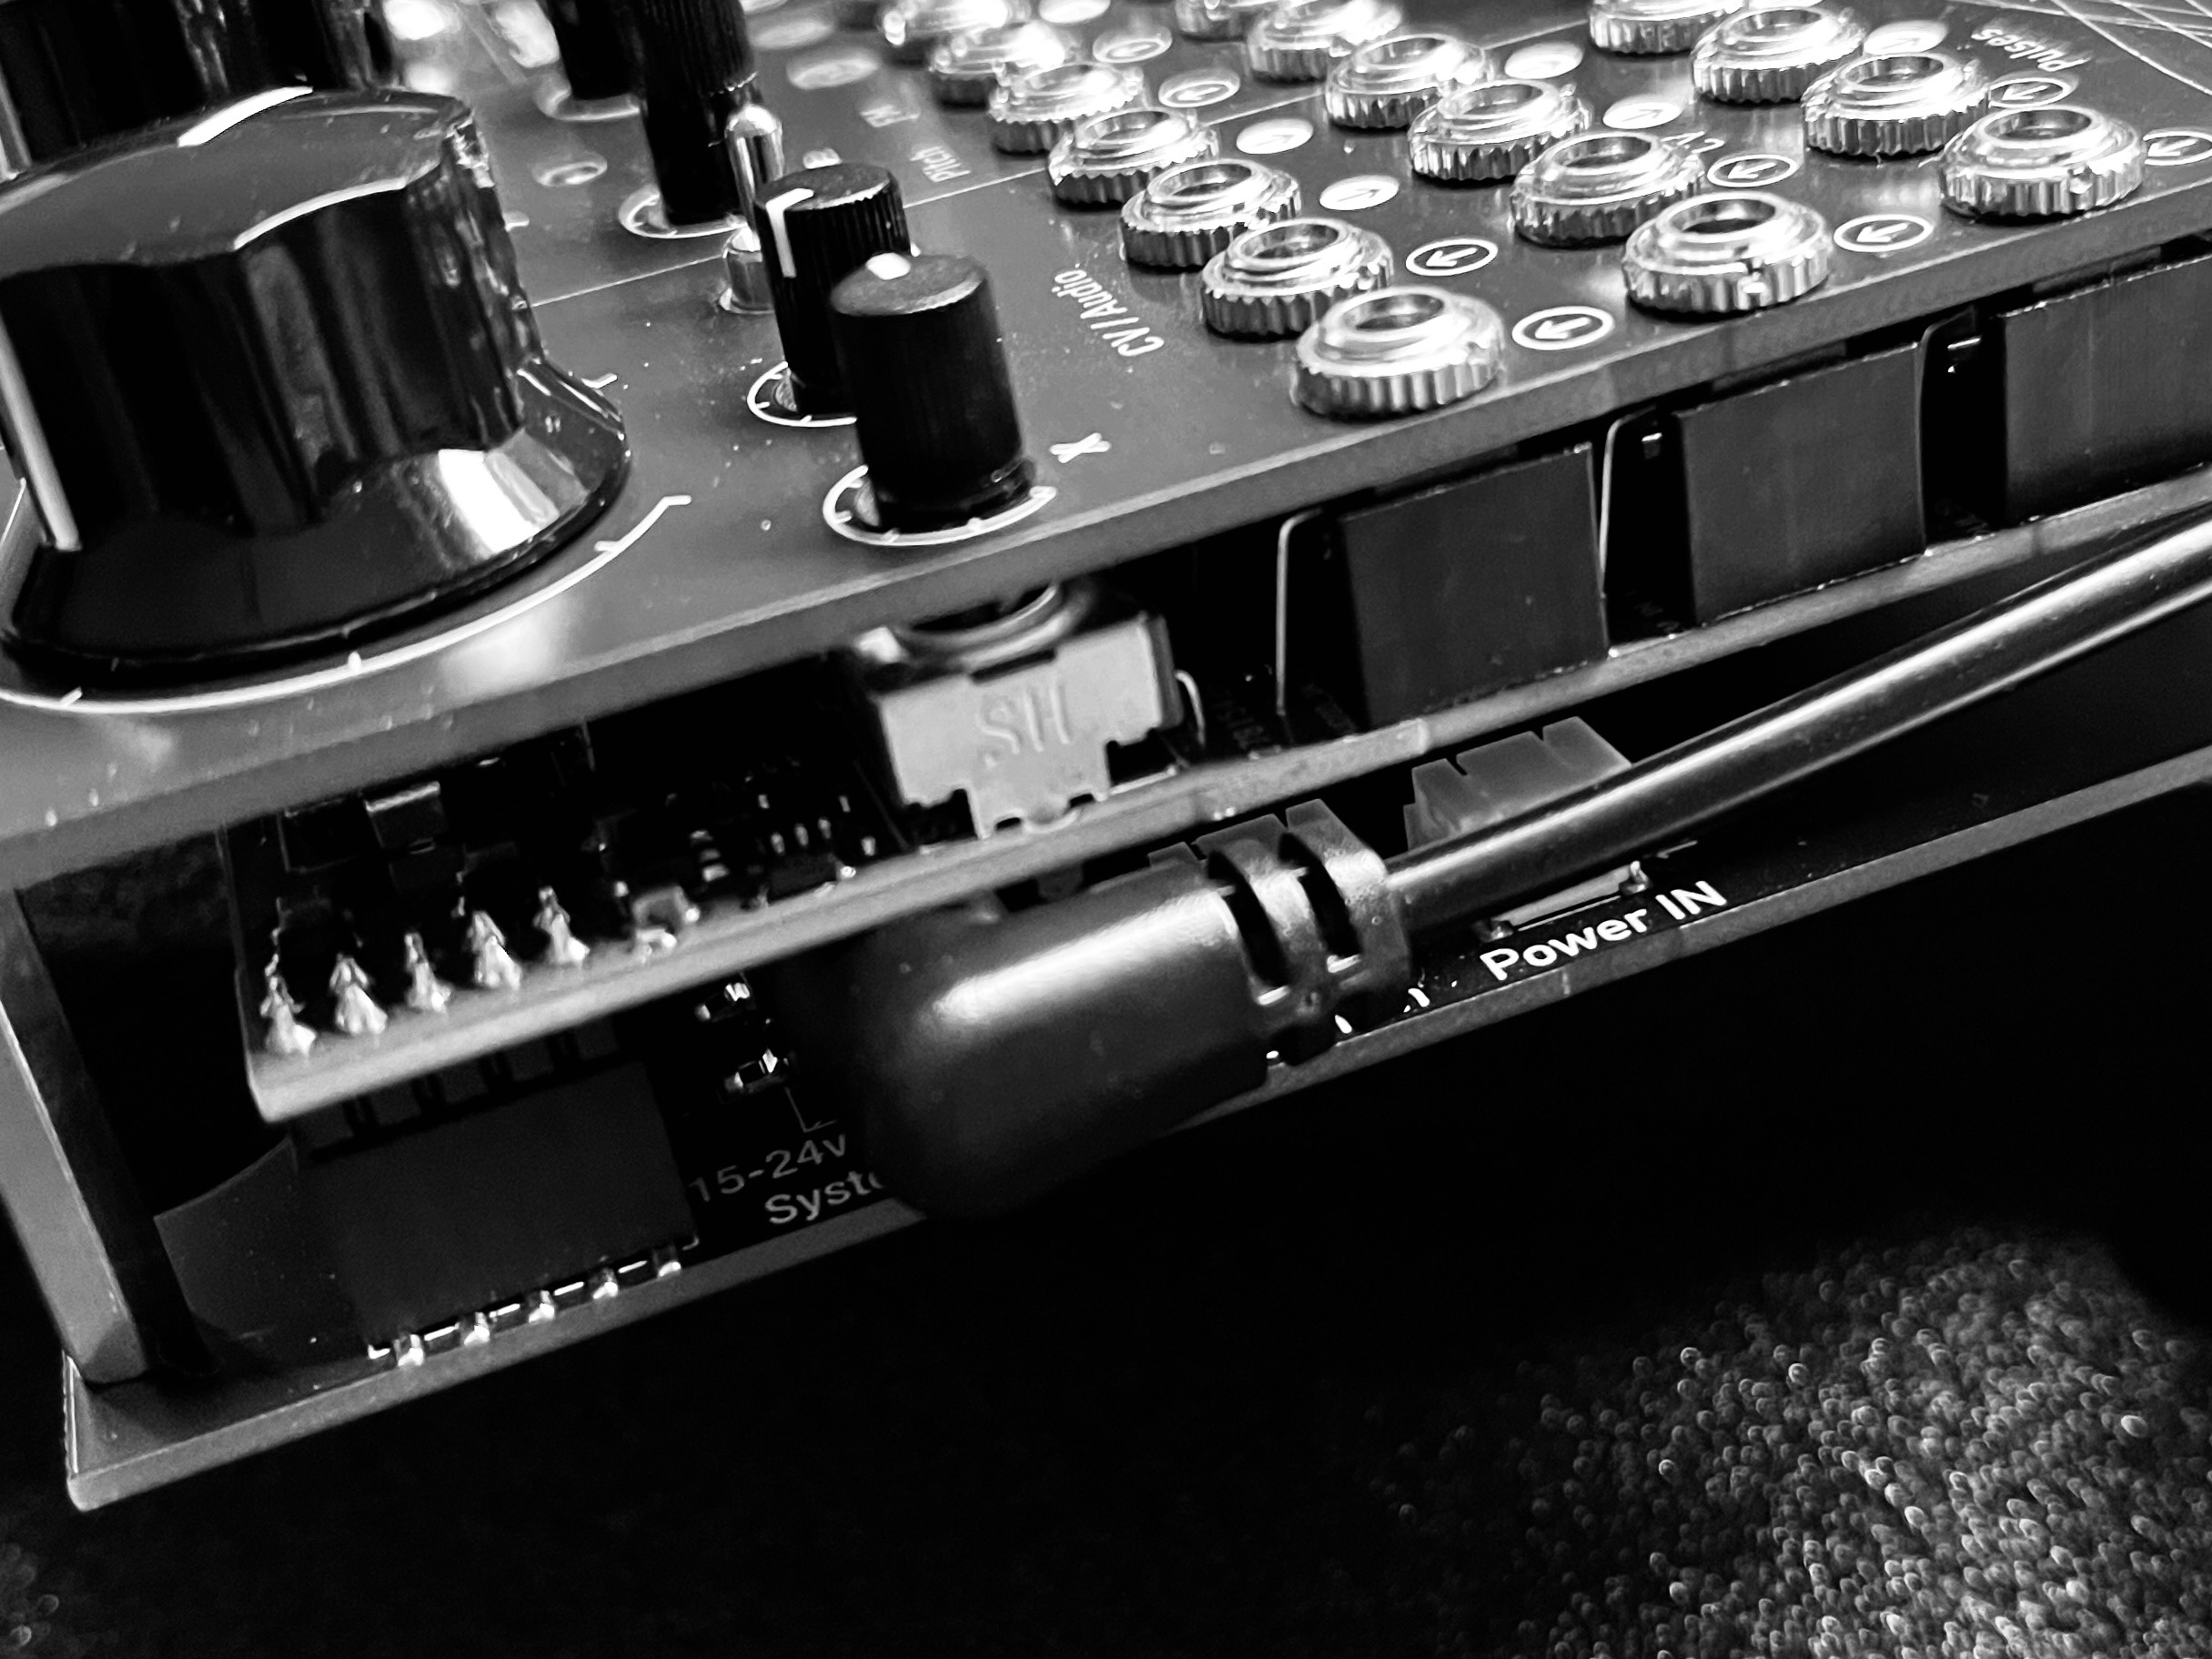
- You can also power the Workshop System using barrel power: 15V to 22VDC, 2.1mm positive tip, the same spec as 4MS pods and Row Power (NB: Moog Semi-Modular power supplies are 12V and NOT compatible).
Patch Cables ←
- The Workshop System uses normal Eurorack-style mono 3.5mm patch cables. You need plenty — start with 10 or so, mostly short, none need to be longer than 30cm.
- To connect guitar pedals you’ll need 3.5mm to 6.5mm cables.
- To connect into or out of the Workshop System you’ll need 3.5mm stereo aux cables.
- You will also need a USB-C data cable to connect the Computer module to a laptop. Please make sure this is a data cable, not a power-only USB-C cable.
- You can plug a dynamic microphone into the Amplifier module with a male XLR to 3.5mm mono cable.
Your first patch ←
Turning it on ←
- Plug in power (Check here if you’re unsure about power) and turn on the switch on the back.
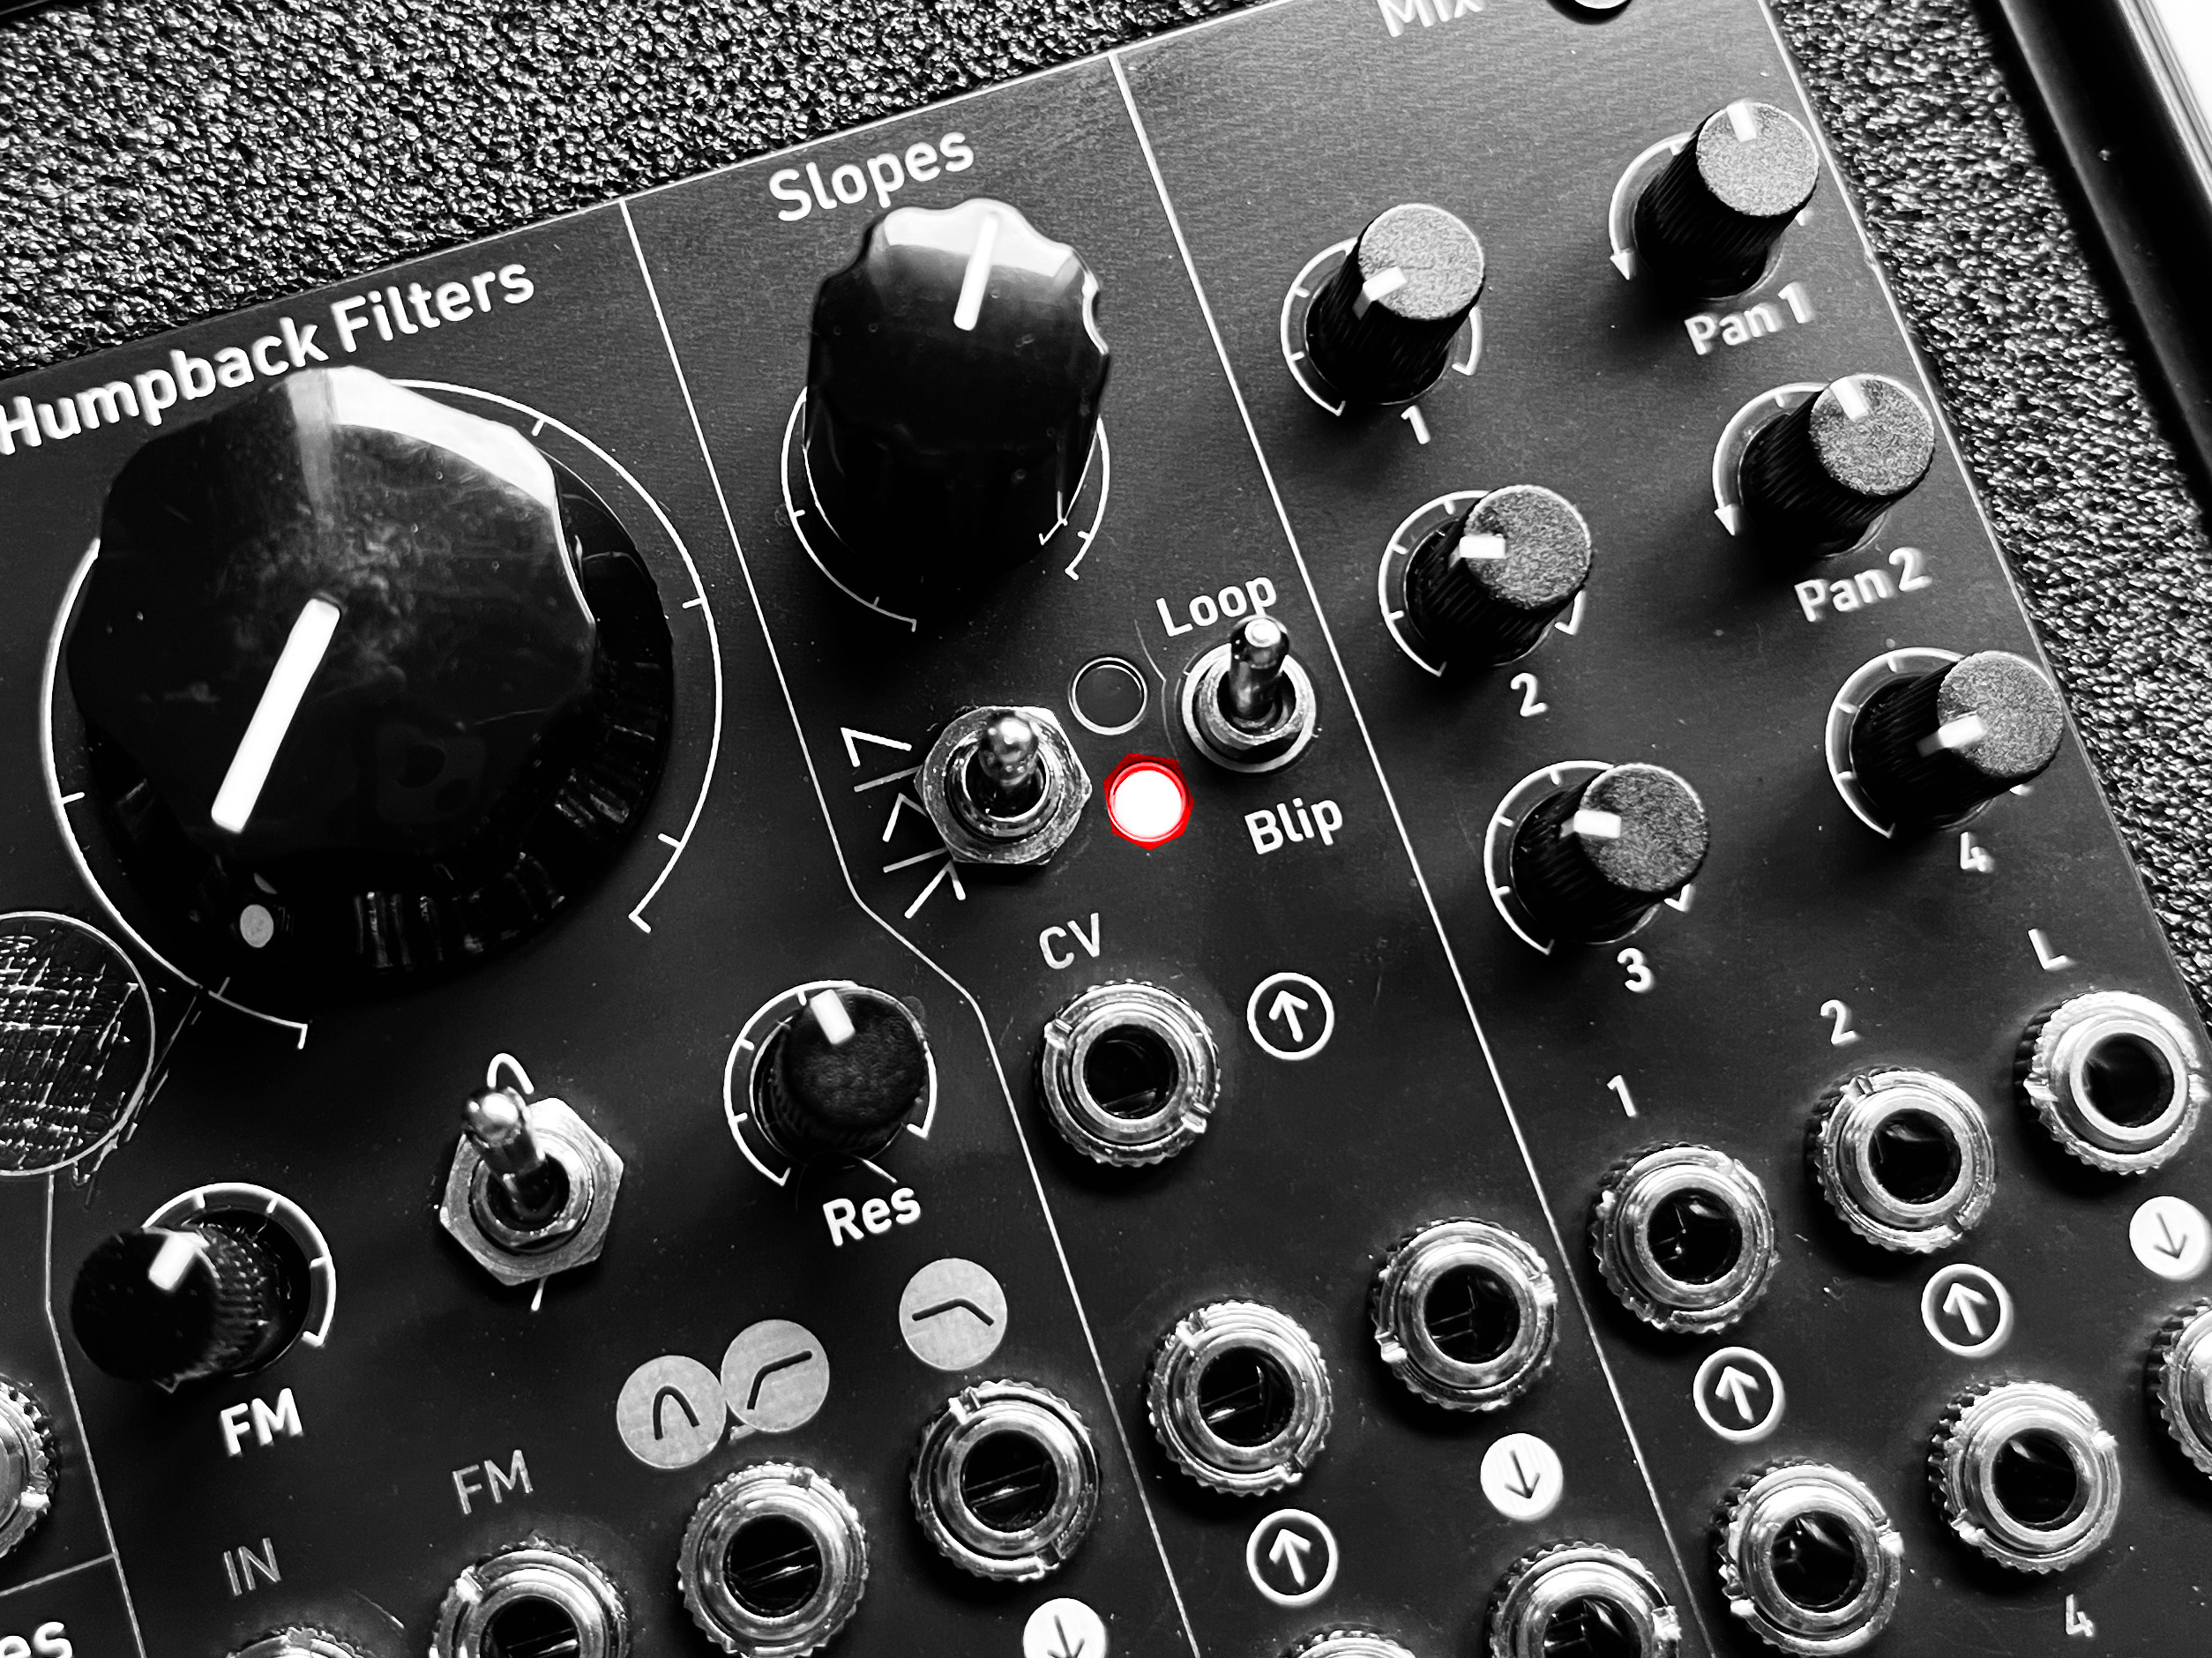
- The four big buttons on Voltages will immediately light up. This is a normal glitch in the logic circuit - Tap one button, it will latch on. No lights? You don’t have any power.
- Now check Slopes. Flip the right switch up to Loop and set the knob to 12 o’clock. You should see the LEDs pulsing up and down. Do the same on the bottom. If neither loops, your power supply is giving 5V or 9V but not 15V.
Making a sound ←
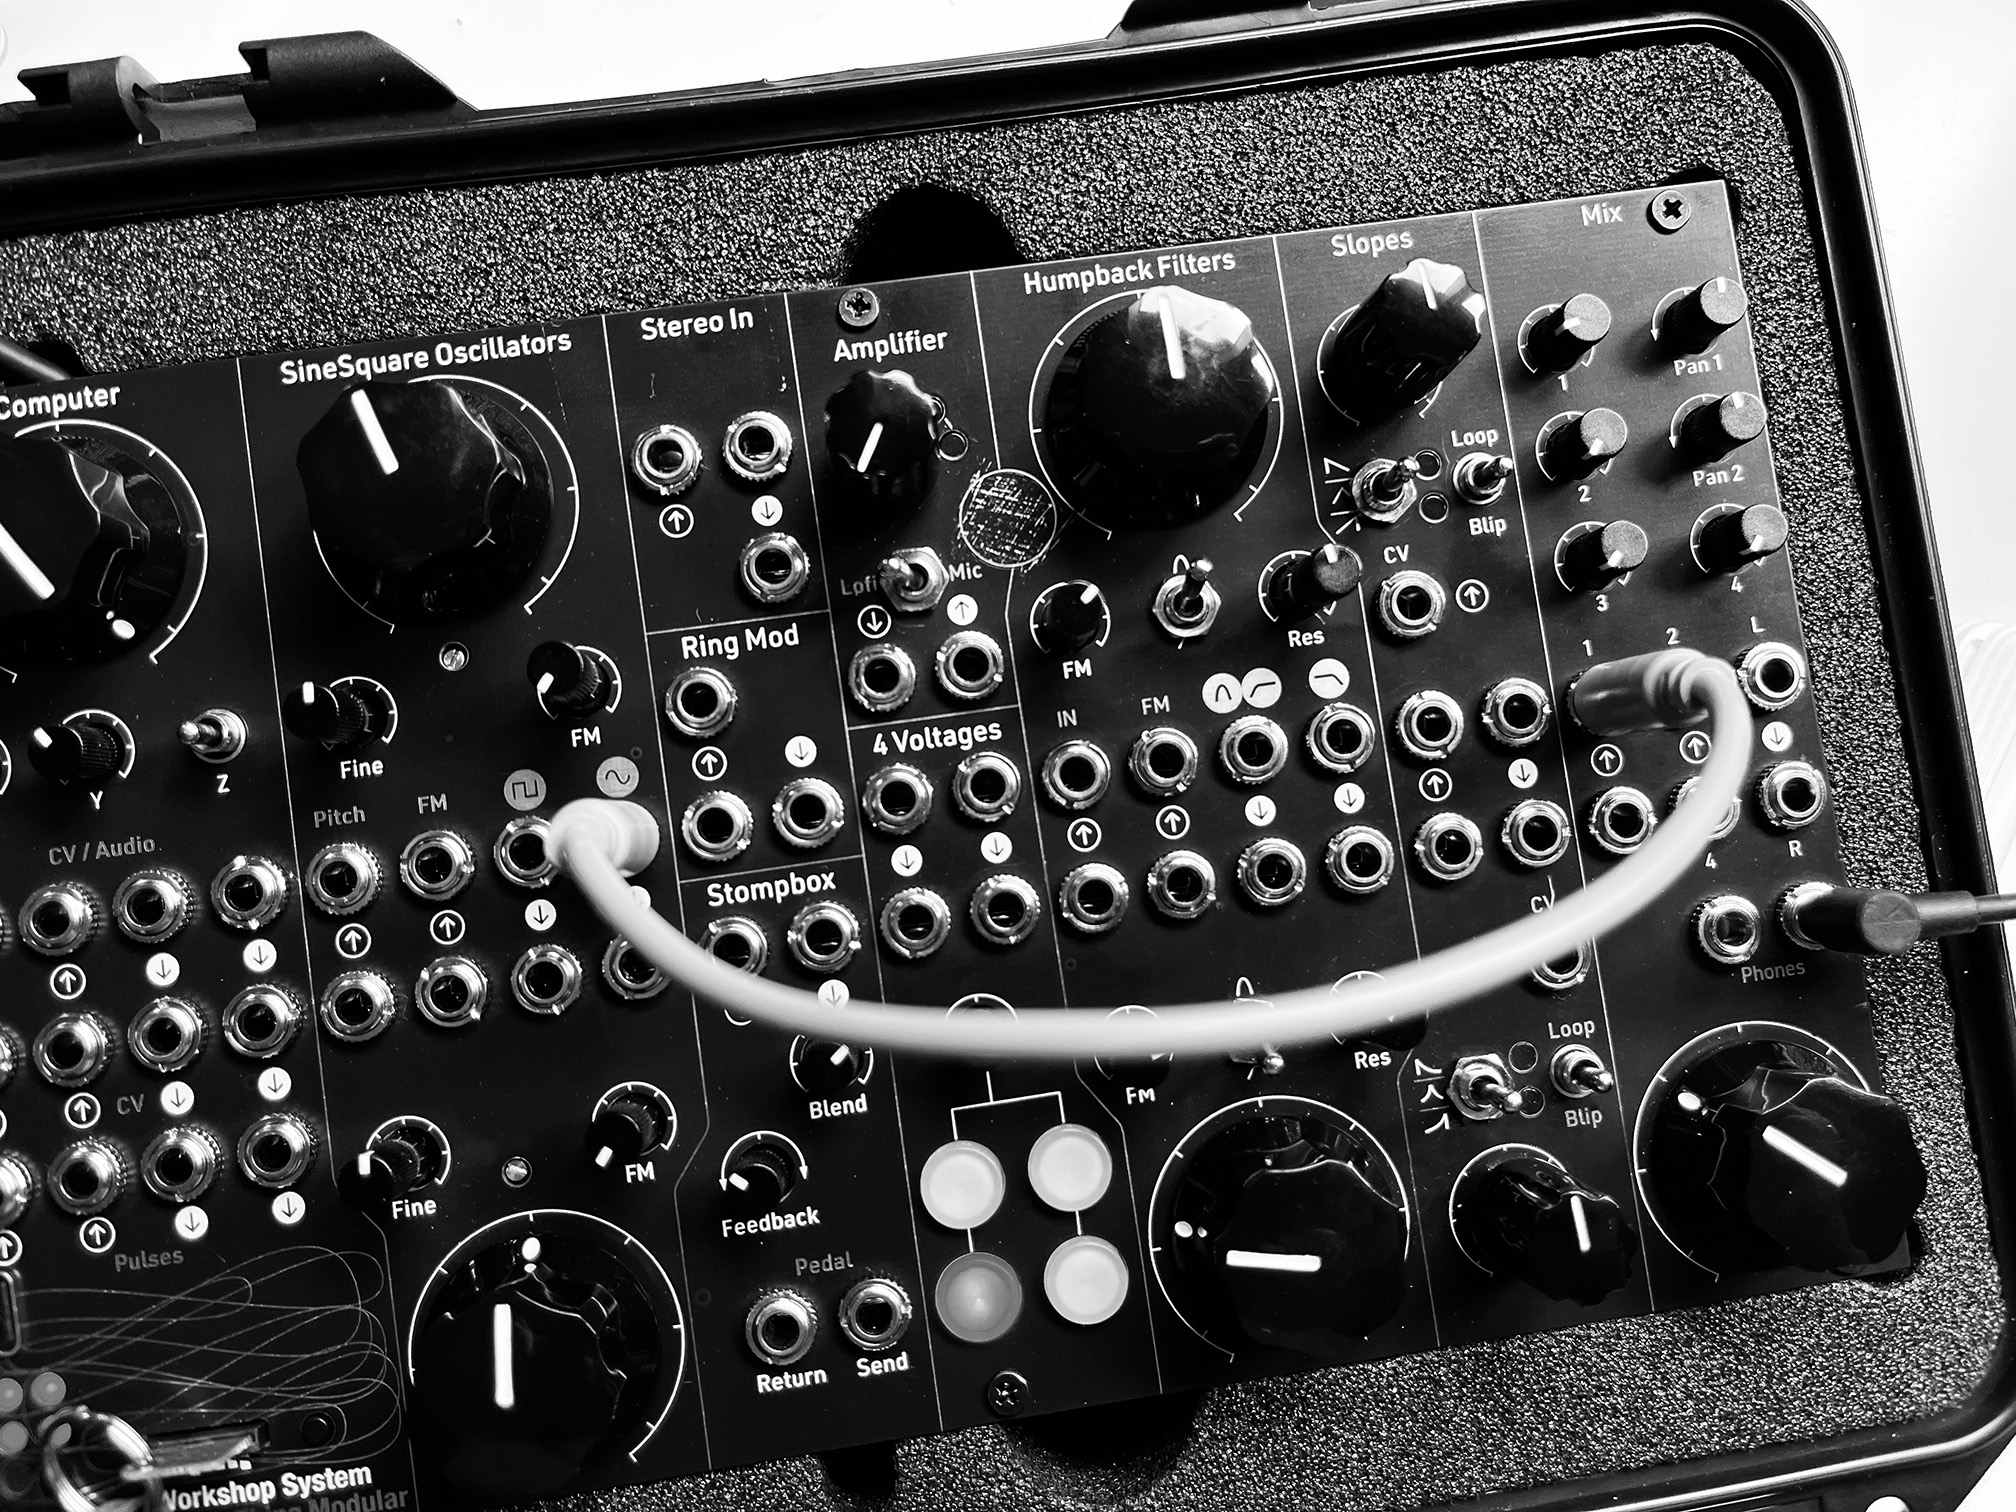
- This is a entirely modular synthesiser, so to make any sound at all, you need patch cables.
- Plug some headphones or a speaker to the headphone out. The two sockets are identical. Turn the big volume knob down.
- Plug one cable from the Oscillator, the top sine wave output (↓) to Mix input 1 (↑).
- Turn the top FM knob right down
- Put the top oscillator knob to 12 o’clock.
- Turn the little Mix 1 knob to 12 o’clock
- Turn the top Pan knob to 12 o’clock
- Gradually turn up the headphone volume knob, and you should hear a sound.
- Wiggle the top knob on the oscillator and the sound should wiggle
Playing and composing with that sound ←
- This patch is a complete electronic instrument: one pure sine wave with one big knob to control its pitch, and a second big knob to control volume. It’s a theremin, with the interface of an Etch-a-Sketch.
- In a perfect world, you’d stop here, master this instrument and use it to make a lot of music that you enjoy. Only then, when you’ve exhausted this instrument completely, should you move on and try a third control or even a second patch cable.
- That’s what we did - for a couple of hours at least - at the first Dyski retreat. Everyone recorded one minute sketches using this patch, using single-line pencil drawings as the score. After an hour, we listened back to people’s recordings, which were… wobbly but interesting and varied.
- Then we spent another hour doing multitrack versions of the same thing. These results were incredible: rhythmic pulses, curtains of sound, drama, tension, surprise. You can hear them on the Dyski album Port Navas Sessions: Sine Wave Portraits.
Your second patch ←
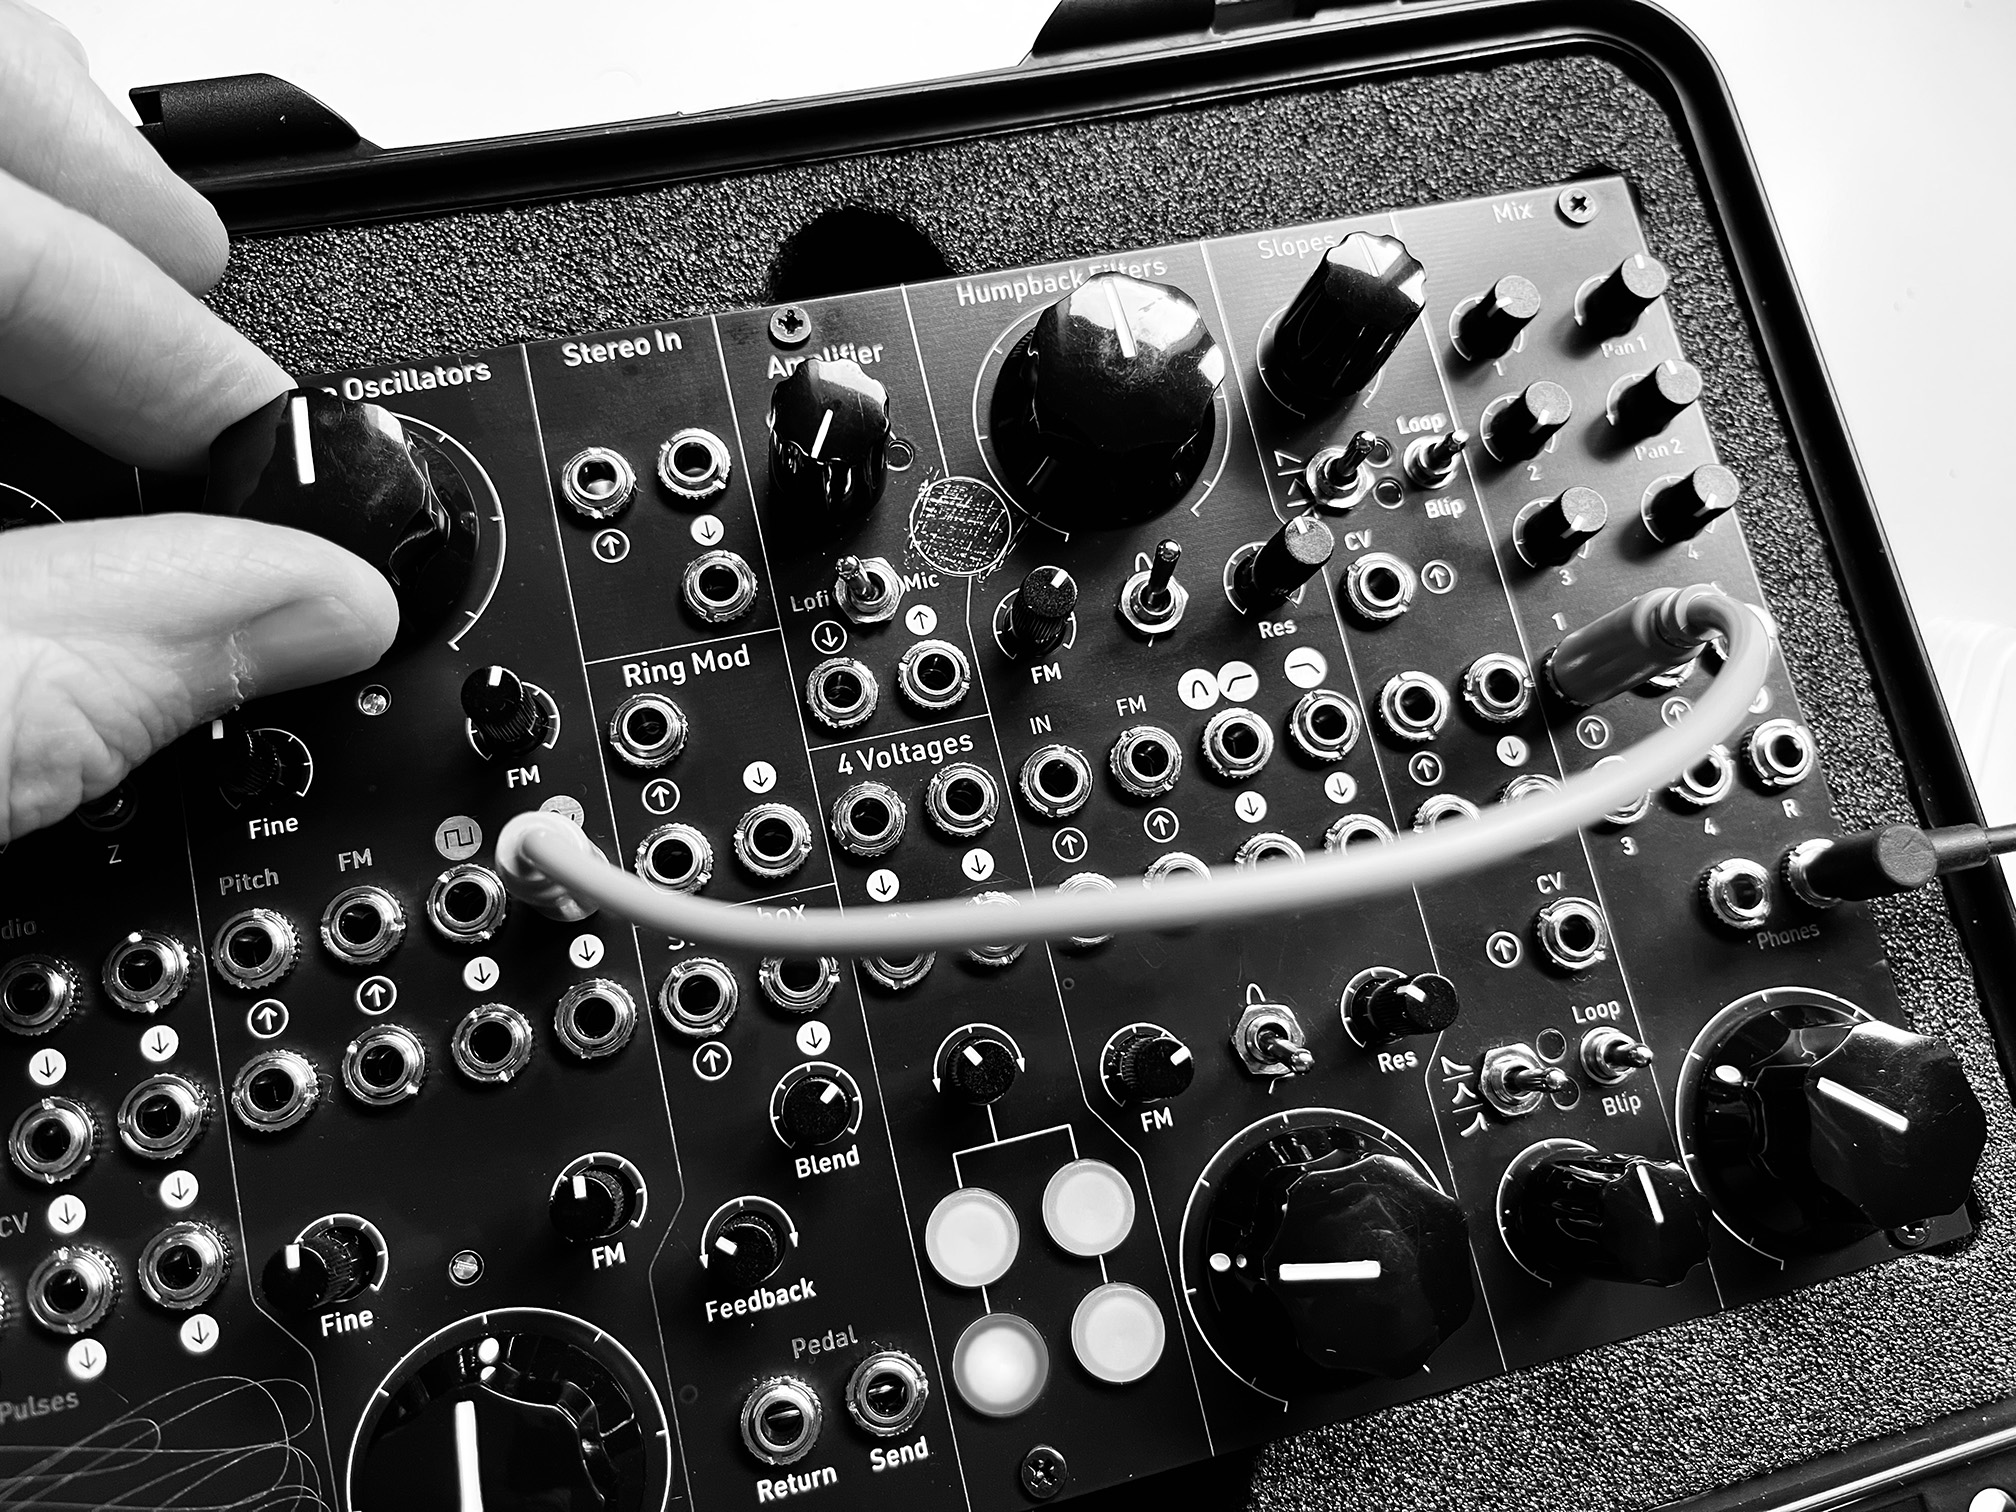
- Without moving any cables, gently turn up FM on the top oscillator.
- Now the frequency is changed by the bottom oscillator, so you have three controls to play with.
- If you also turn up FM on the bottom oscillator, you get a very chaotic, unpredictable system.
Your third patch ←
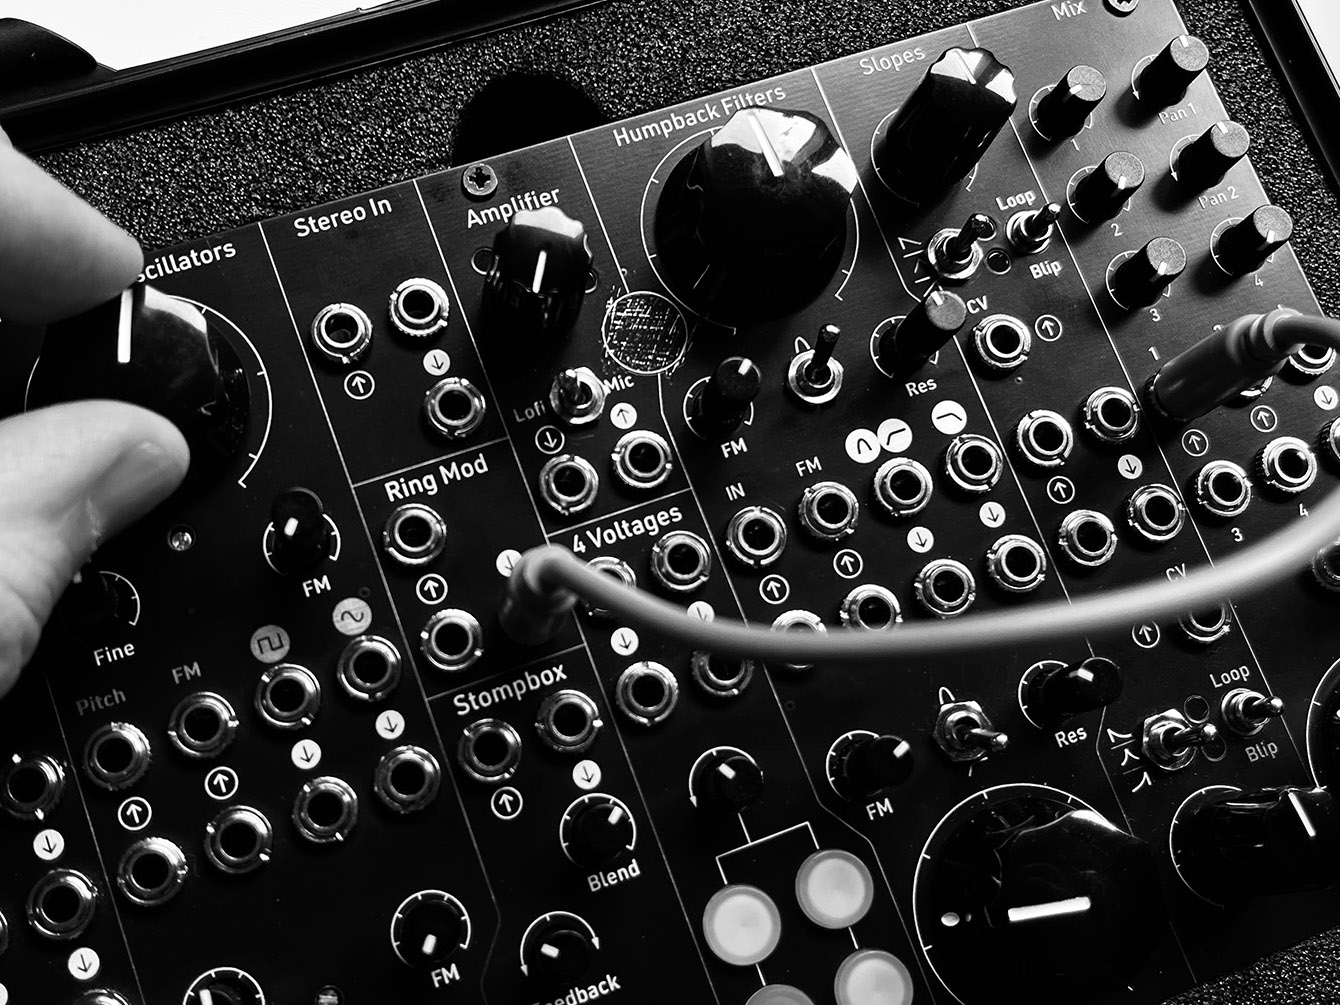
- Turn down both FM knobs for now, and move the patch cable from Sine and to Ring Mod Output (↓)
- With the ring modulator, the bottom oscillator changes the volume of the top oscillator is. It’s more interesting than you might expect.
- Next, try patching an external source - your phone or laptop, or a drum machine - into the Ring Mod.
Patching rules ←
- You cannot damage the system by patching anything to anything else
- You could potentially damage the system by poking cables or anything else into the sides of the system, damaging the components on the circuit boards.
- All modules have outputs: (↓)
- Most modules have inputs: (↑)
- All inputs and outputs can be stacked with stackables or mults. For example, patch both oscillators into one filter and the two signals will be mixed.
- With ten patch cables, there are c. 1.5 × 10²¹ possible ways to patch the Workshop System, although only about 70,000 of those will make much sense.
- Document your patches on this handy PDF patch sheet (created by Tom Tebby)
What is everything? ←
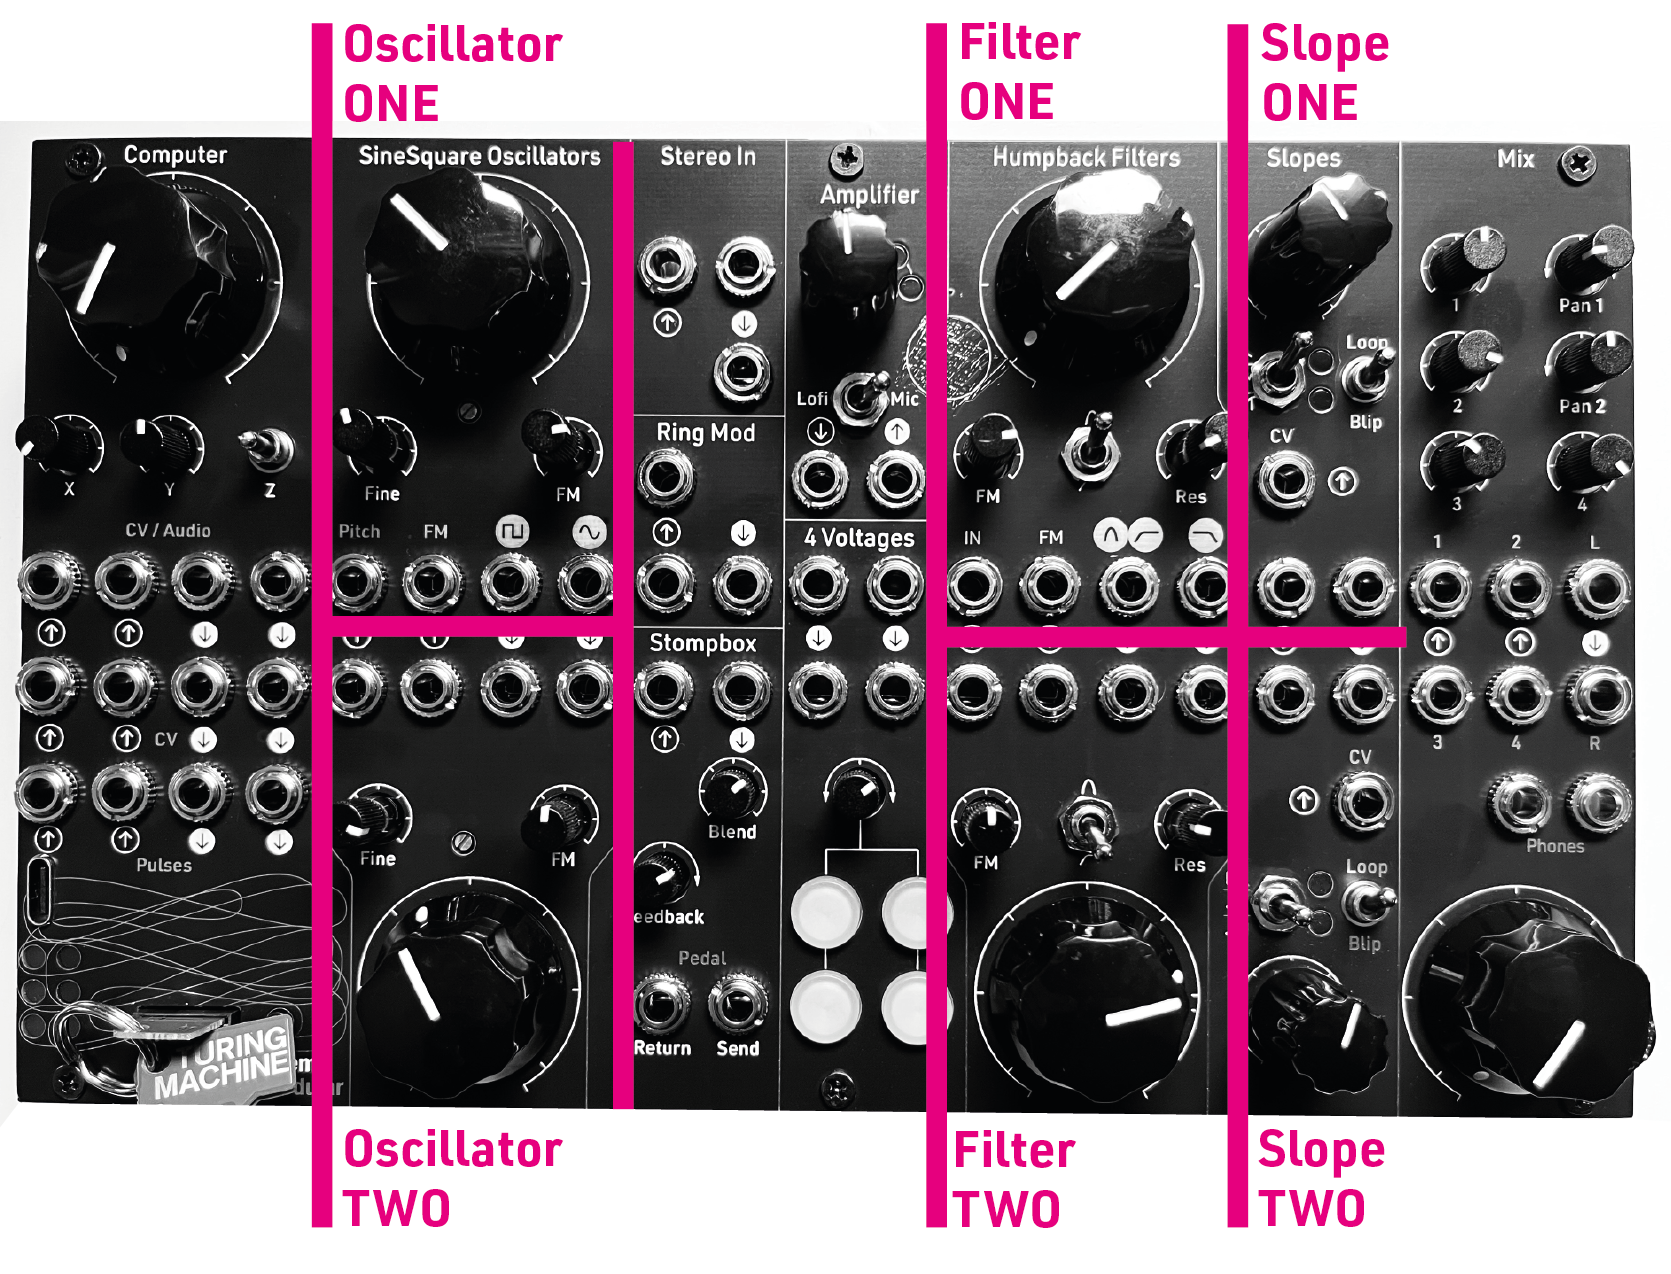
What to see when you look at the panel ←
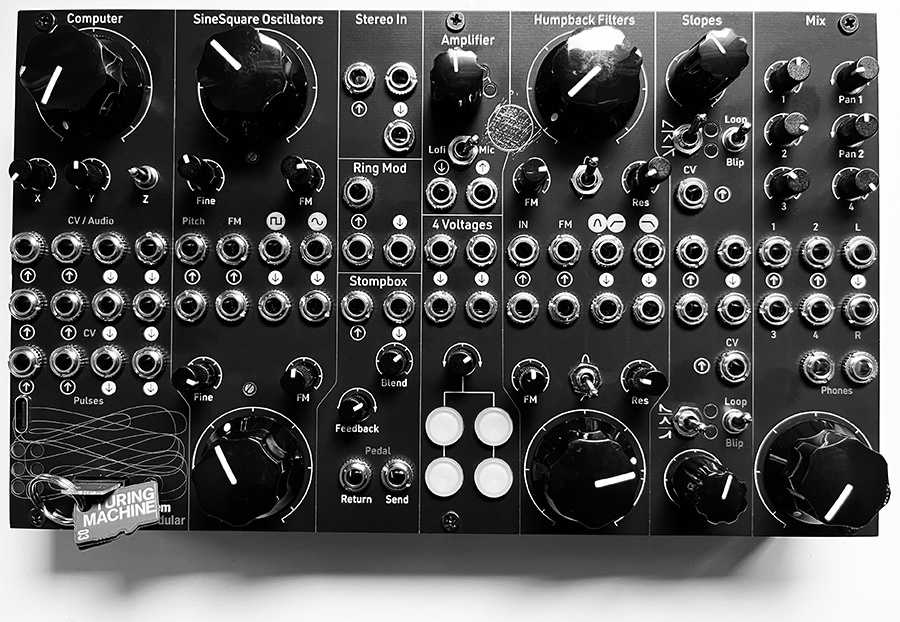
The Workshop System has thirteen modules:
- Computer, which reads tiny memory cards to make and change audio, CV and pulses.
- SineSquare Oscillators Two wide range, volt per octave analogue oscillators
- Stereo In Aux input for 3.5mm stereo signals
- Ring mod A nice-sounding hi-fi ring modulator / VCA
- Stompbox pedal-friendly effects loop with a feedback control
- Amplifier A built-in contact microphone and pre-amp, which doubles as a gritty distortion circuit
- 4 Voltages An unpredictable, playable four-way voltage generator
- Humpback Filters Two analogue filters with lowpass, highpass and bandpass outs
- Slopes Two voltage controlled slopes that can be used as envelopes, LFOs or glides
- Mix A four channel stereo mixer with two headphone amps
Modules in detail ←
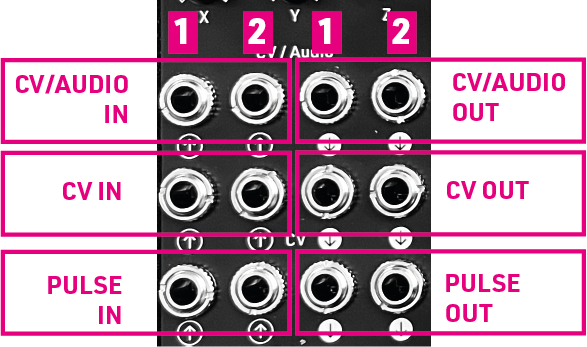
Computer ←
- The Computer module is a multi purpose audio, CV and pulse computer.
- It runs software stored on tiny program cards.
- These are the same size as Micro SD cards but are completely different electronically. You cannot use Micro SD cards in Computer.
- So Computer can be a MIDI controller, a Reverb, a sequencer or many other things.
- Your kit comes with three program cards and one blank card. Over time, more cards will be available for sale.
SineSquare Oscillators ←
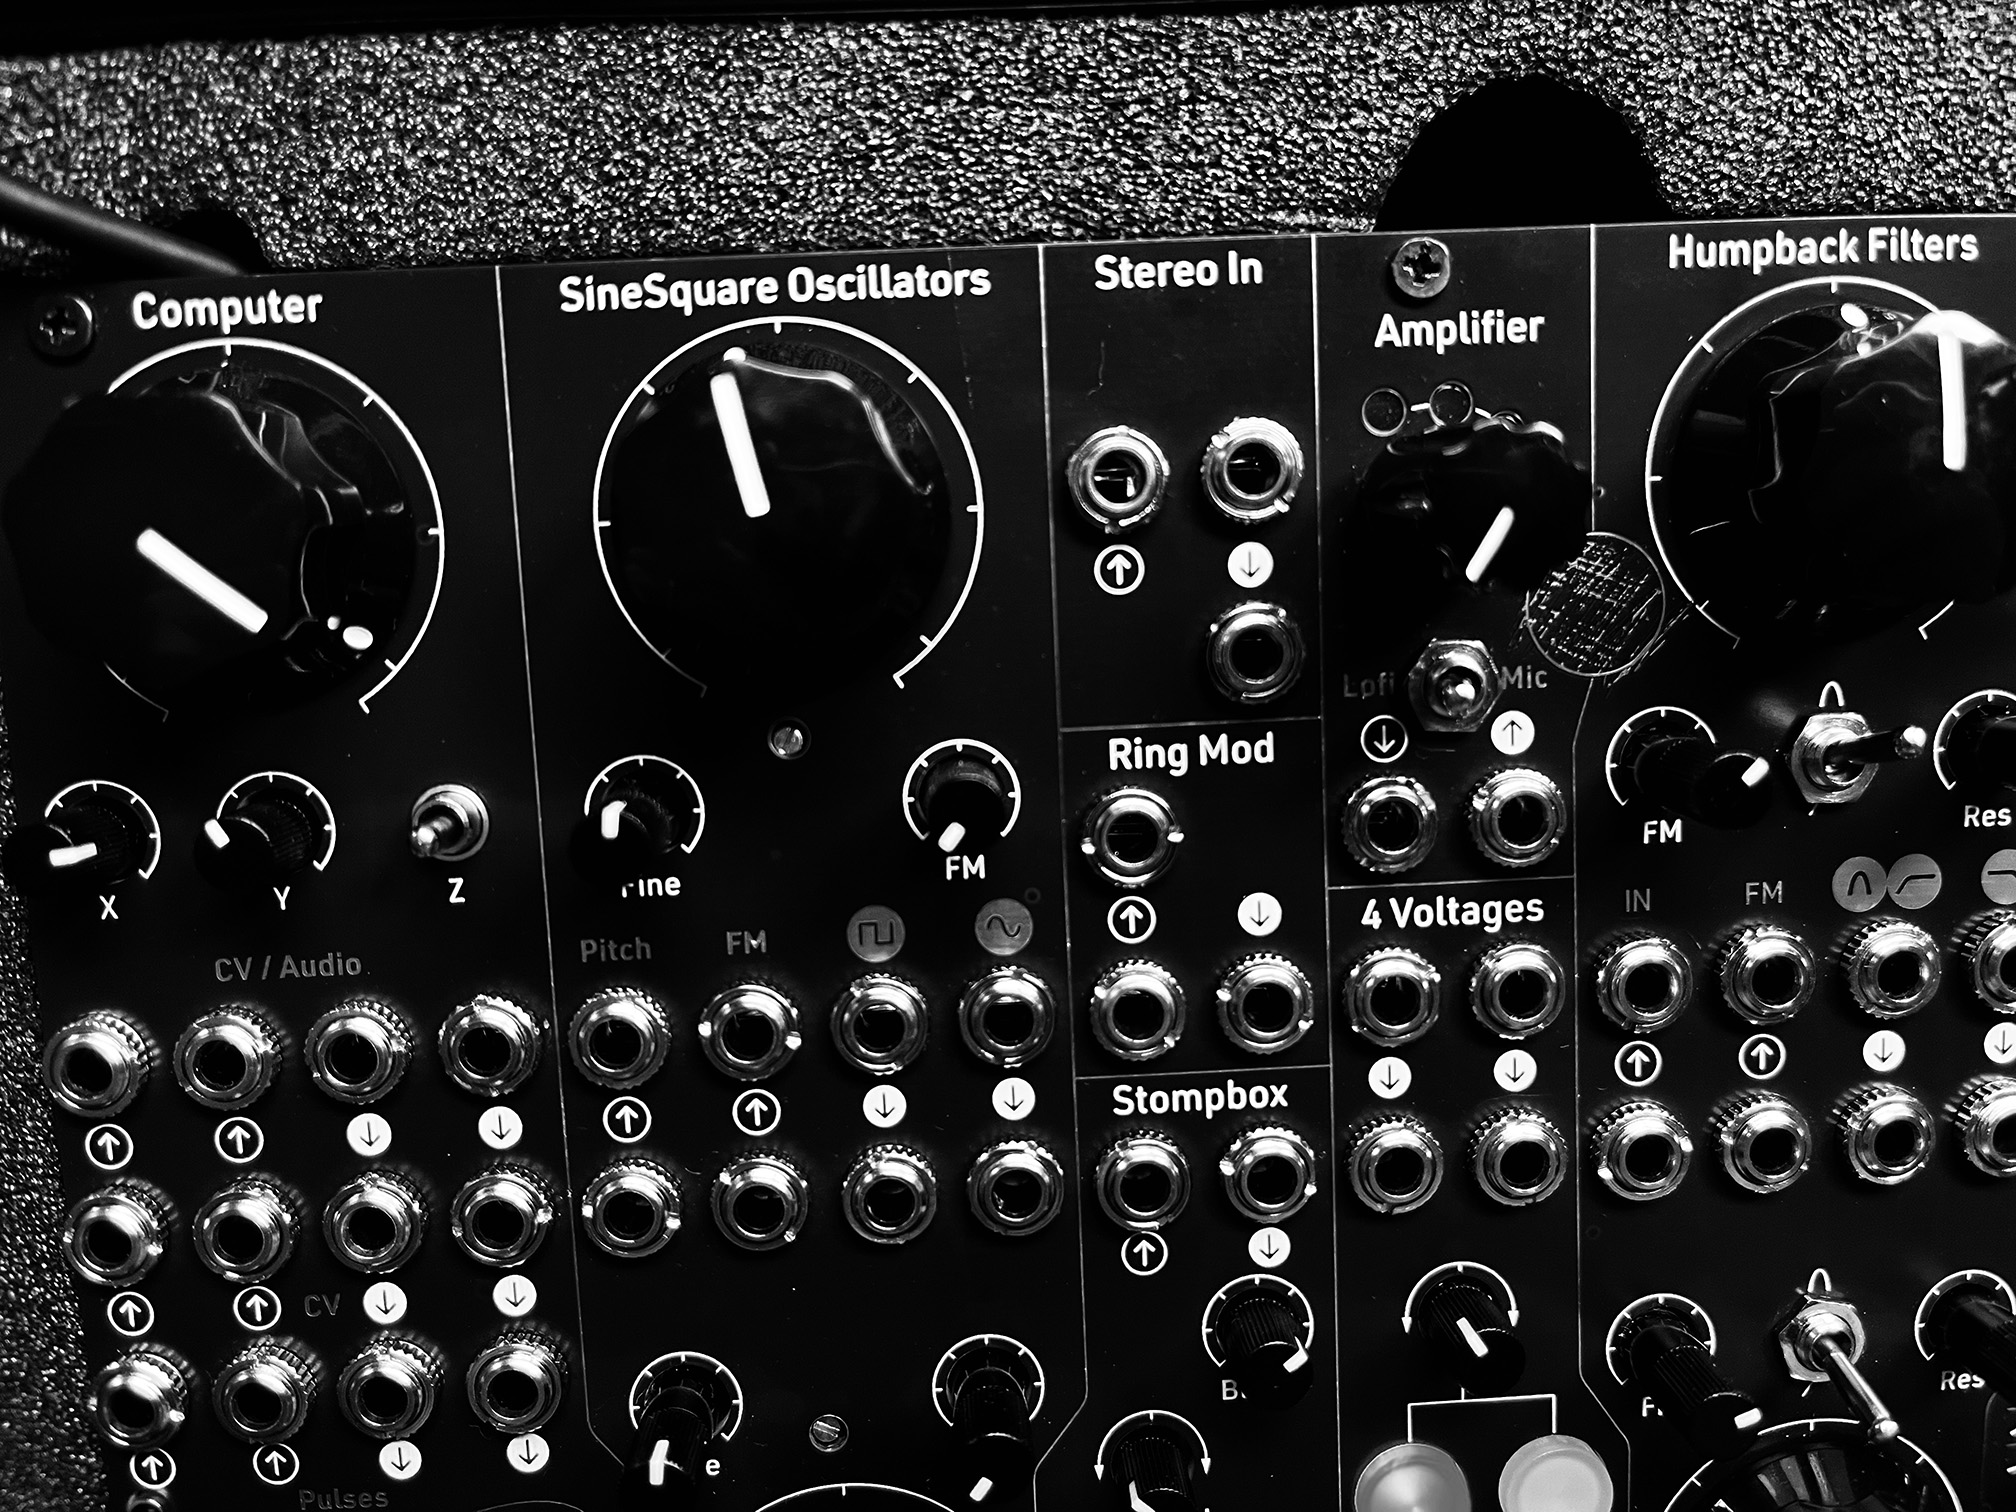
- These are simple triangle-core oscillators based on classic synth circuits from the 1970s, updated with modern components.
- It’s a nice sounding circuit that is particularly good for FM. You can make bell-like sounds with a bit of FM and Ring Mod.
- Each FM input is connected to the other oscillator’s sine wave output.
- The small trimmers are for calibration. These aren’t ultra-precise oscillators but they are temperature compensated and can be calibrated for 3-4 octaves if you have the patience.
Stereo In ←
- Plug anything in here - a laptop or phone, drum machine, shortwave radio or Walkman. It will boost the signal to modular level. Use the volume control on the device if it’s too loud.
Ring Mod ←
- This is a simple, clean Ring Modulator — technically a Four Quadrant Multiplier circuit designed by Sebastian Azevedo.
- The top input is for audio, the bottom input is for modulation, which can be audio or CV.
- The top and bottom sine oscillators are connected to the inputs.
- It can also be used as a simple VCA by connecting a unipolar control signal (like Slopes) to the bottom input.
Stompbox ←
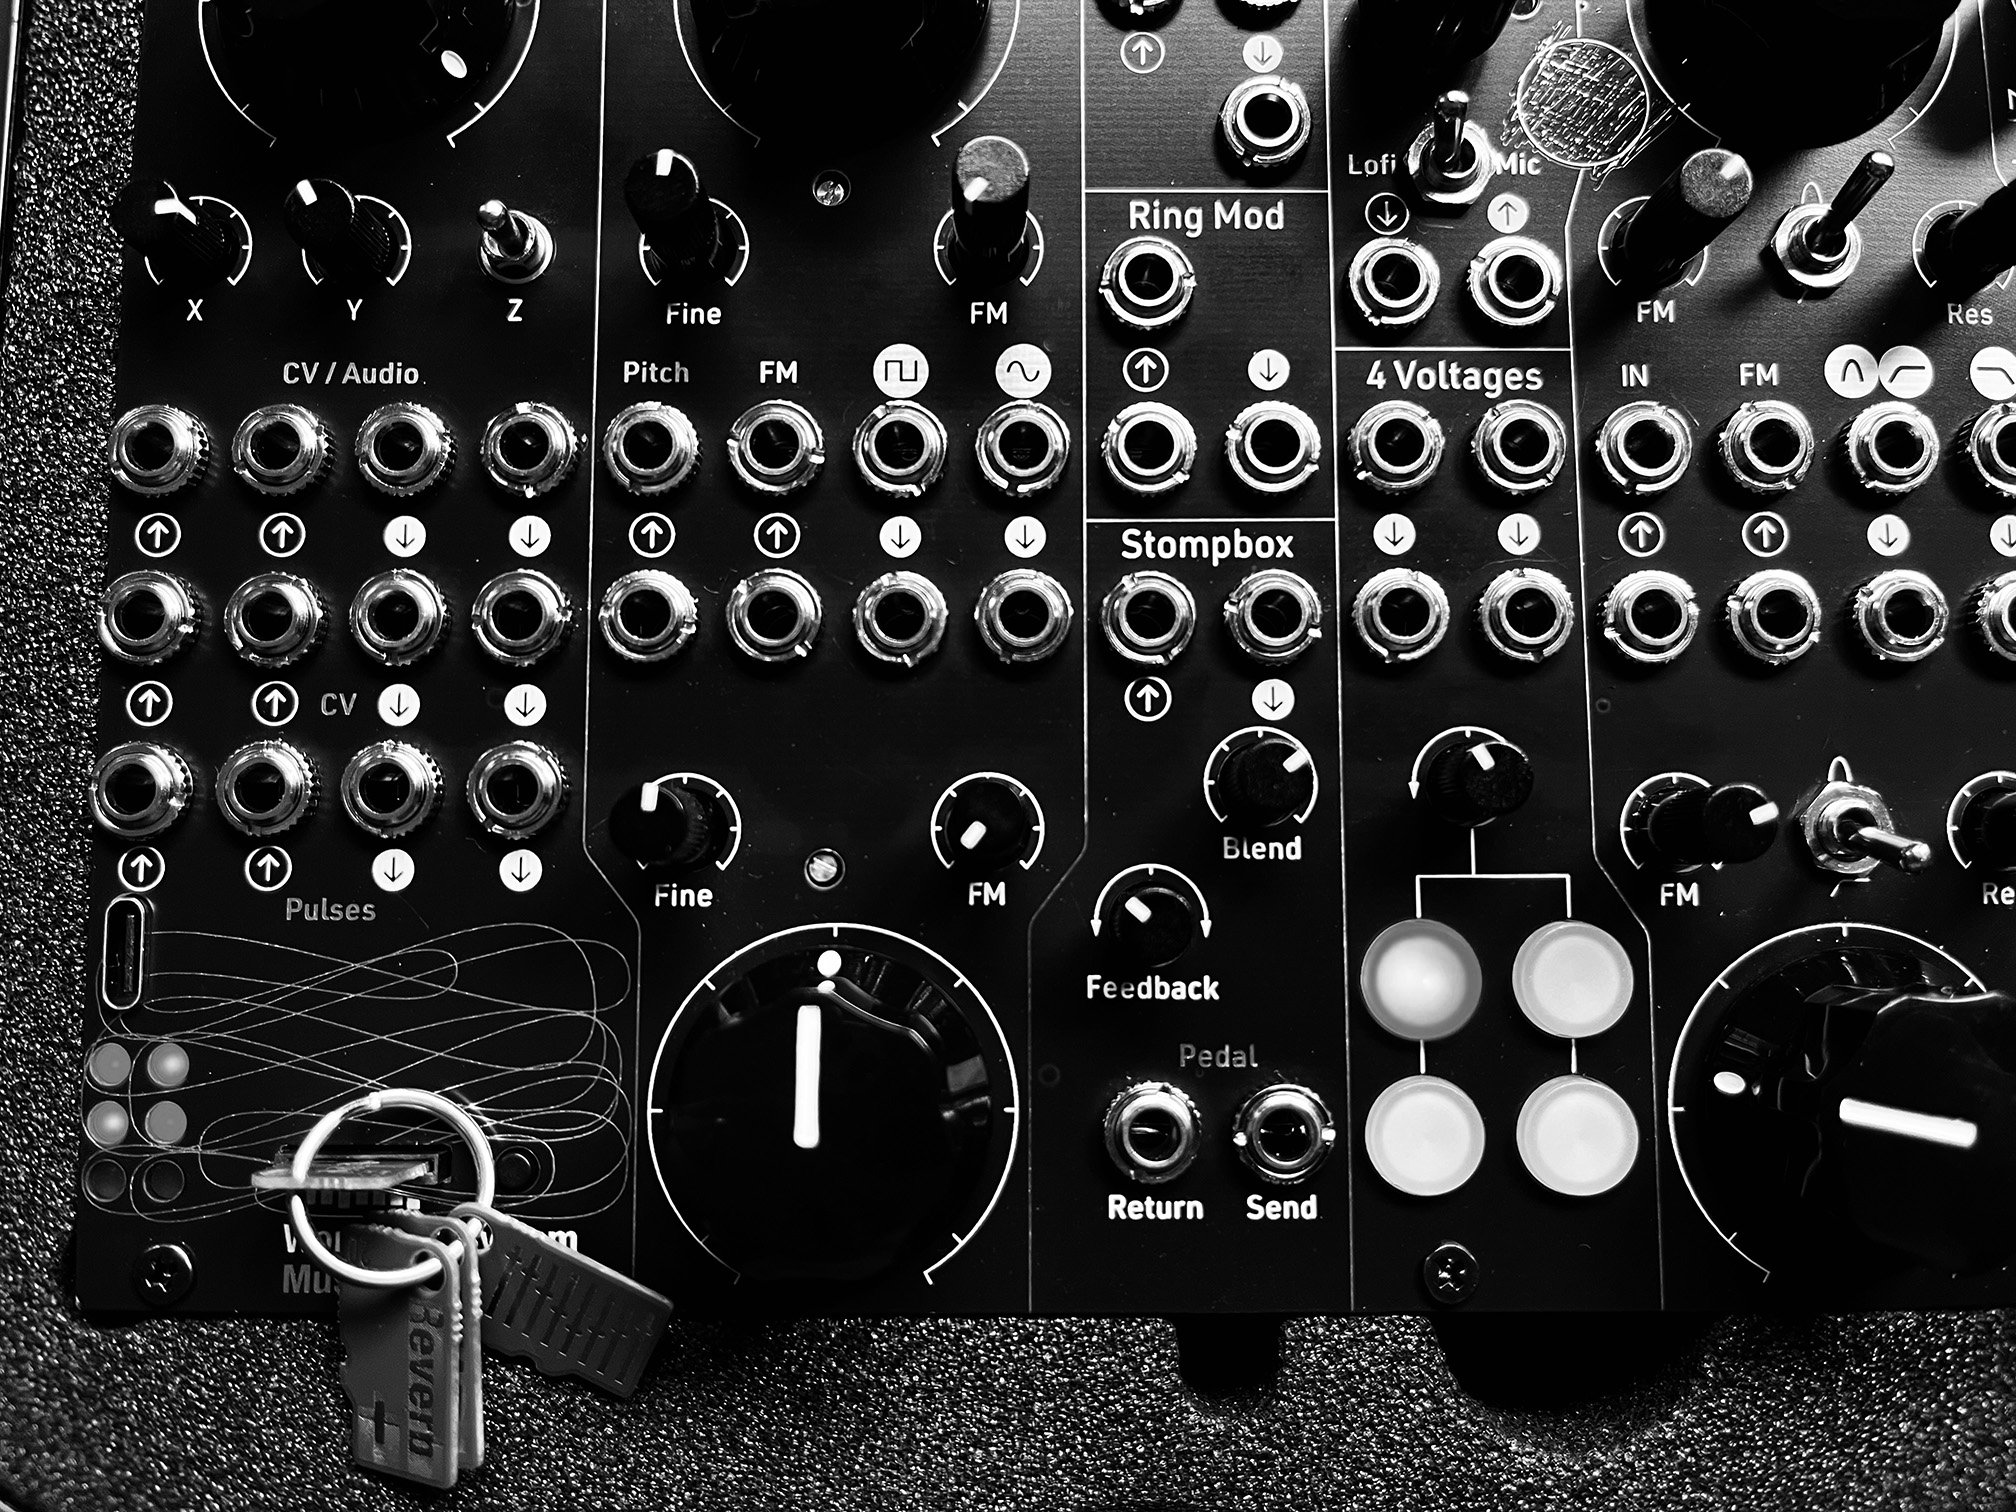
- This is a send-return circuit to use guitar pedals, or other effects units inside patches.
- Underneath the panel there is a 2.1mm 9V Centre Negative pedal power output. This can supply up to 300mA of power.
- Use 3.5mm to 6.5mm cables to connect out to pedals.
- The blend control sets the dry/wet mix. If the pedal has a mix control, set it to fully wet.
- Feedback sends the pedal output back into the input, with unpredictable results. Distortions and fuzzes get louder and may oscillate. Phasers and Choruses may get more extreme. Delays may self-oscillate, reverbs may become odd.
- The feedback control is an attenuverter. At 12 o’clock it’s off, 5 o’clock and 7 o’clock are maximum. Try both directions and use the one that sounds better for each pedal.
Amplifier ←
- Behind the panel is a piezo contact microphone.
- With nothing connected to input (↑), the sound of that mic comes from the output (↓) if you turn up the gain.
- There’s a choice amplifier circuits.
- Mic is the clean, contact mic optimised op-amp circuit from Mikrophonie. It’s often brighter and crisper.
- Lofi is the simple transistor amplifier from Mini Drive. It sounds great when overdriven.
- At modular levels, both amplifier circuits work as distortion / fuzz / overdrive.
- A normal dynamic microphone like an SM58 works well through Amplifier.
4 Voltages ←
- Think of this as a Minimum Viable Keyboard. Use it to control other modules.
- At any point, there are four different voltages coming from the four outputs (↓). They won’t change unless you move the knob or push a button.
- If you move the knob, all those four voltages will change. Some will go up, some will go down. If you move the knob back, they’ll go back.
- If you press a different button, all those four voltages will change. Some will go up, some will go down. If you press the previous button, they’ll go back.
- If you press several buttons together, they won’t latch, but they will produce different voltages.
- The different outputs may behave differently — some have wider ranges or take smaller jumps when buttons are pushed.
- The voltages are generated by a network of resistors fed by the the button outputs and the knob position. So they aren’t random — they can’t change by themselves — but they’re not at all predictable.
Humpback Filters ←
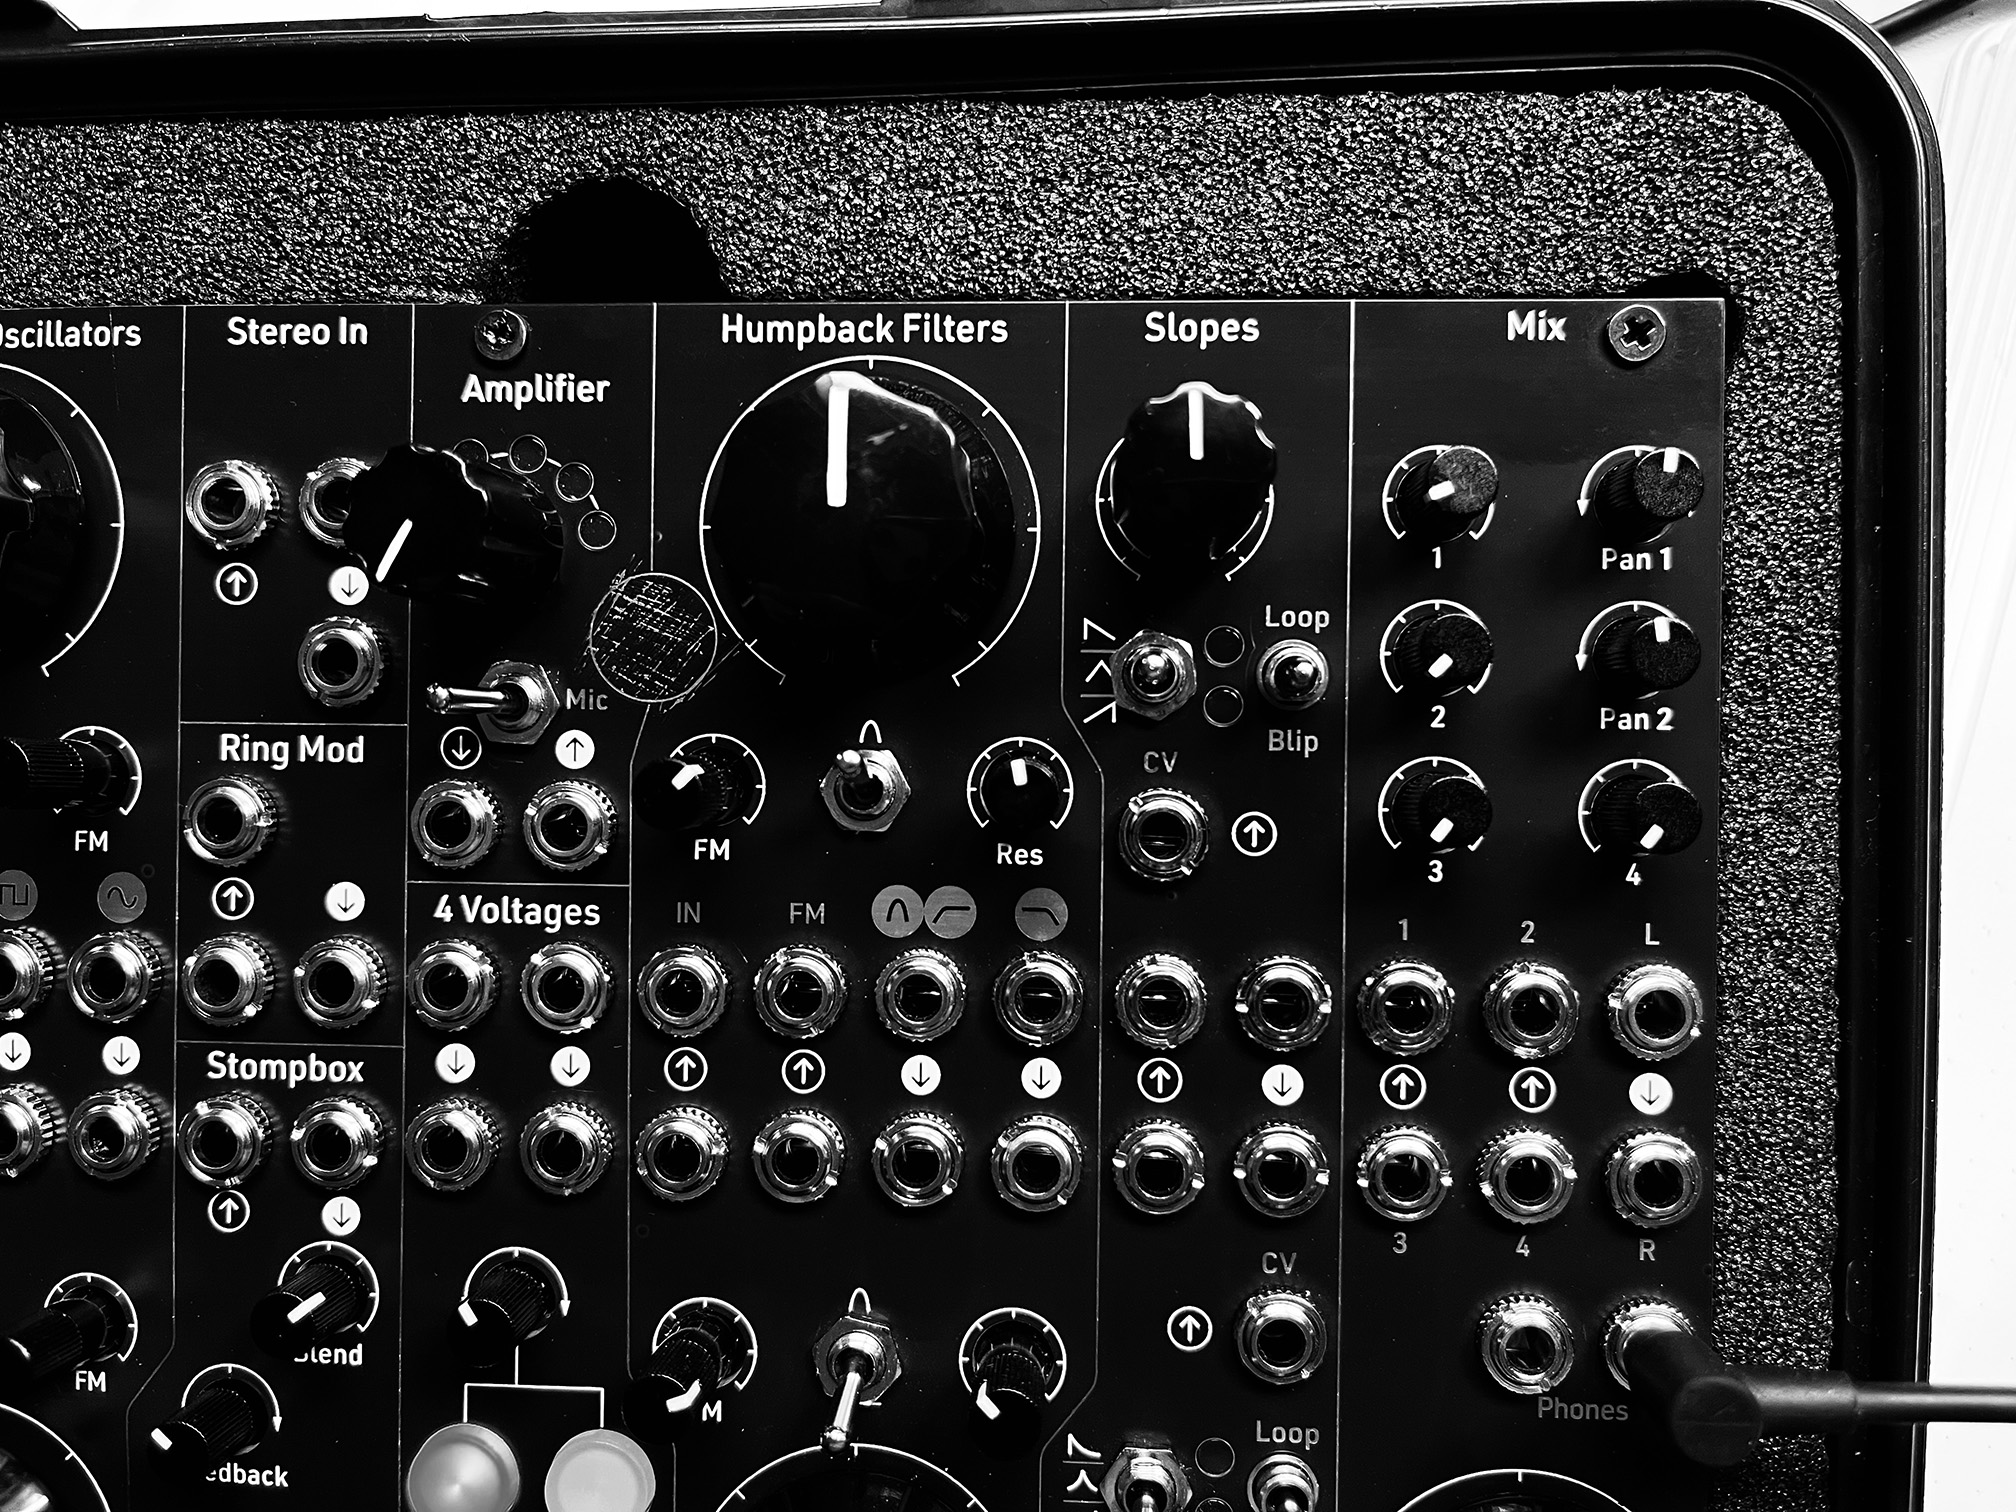
- These are simple, classic 1970s-style filters, designed by Philip Goulding / Godsbox.
- One output is switchable band pass or high pass. The other is always low pass.
- The top filter output is connected to the bottom filter input. Set the top switch to high pass and patch the bottom output (↓) to the mixer for the MS20 dual filter setup.
Slopes ←
- These are versatile Voltage Controlled Slopes, loosely based on the Serge VCS circuit.
- In Loop mode they work like a low frequency oscillator, with the shape set by the left hand switch.
- Outside loop mode, they become an envelope generator. Patch a pulse from Computer to the input (↑), set the shape switch to falling, and use the knob to set the decay time.
- Short pulses can only really trigger Slopes in Falling mode. In Rise or Up/Down, they make the signal rise, but only as long at they’re active — not very much.
- Slopes can also add glide or portamento to changing voltages, or work as a simple envelope follower.
- The top slope is linear, the bottom is exponential — so it responds faster. You can change both responses by cutting or closing traces on the back of the circuit board.
Mix ←
- Simply a four channel stereo mixer with two headphone amps
- Channels 1 and 2 have pan controls, channels 3 and 4 are mono (they come out of both ears)
- The left and right modular level outputs are not effected by the big volume knob. These outputs are useful for patching back into the system for feedback and chaos patches.
Calibration ←
- The Workshop System has been designed to require minimal calibration.
- You don’t need to calibrate the system before using it.
- Calibration is only required for precise volt per octave tuning when using the MIDI card, or using the SineSquare oscillators with external keyboards or sequencers.
- Full calibration details and video.
Modifying and personalising your system ←
- The Workshop System is designed to be open and hackable, there are many ways to modify it.
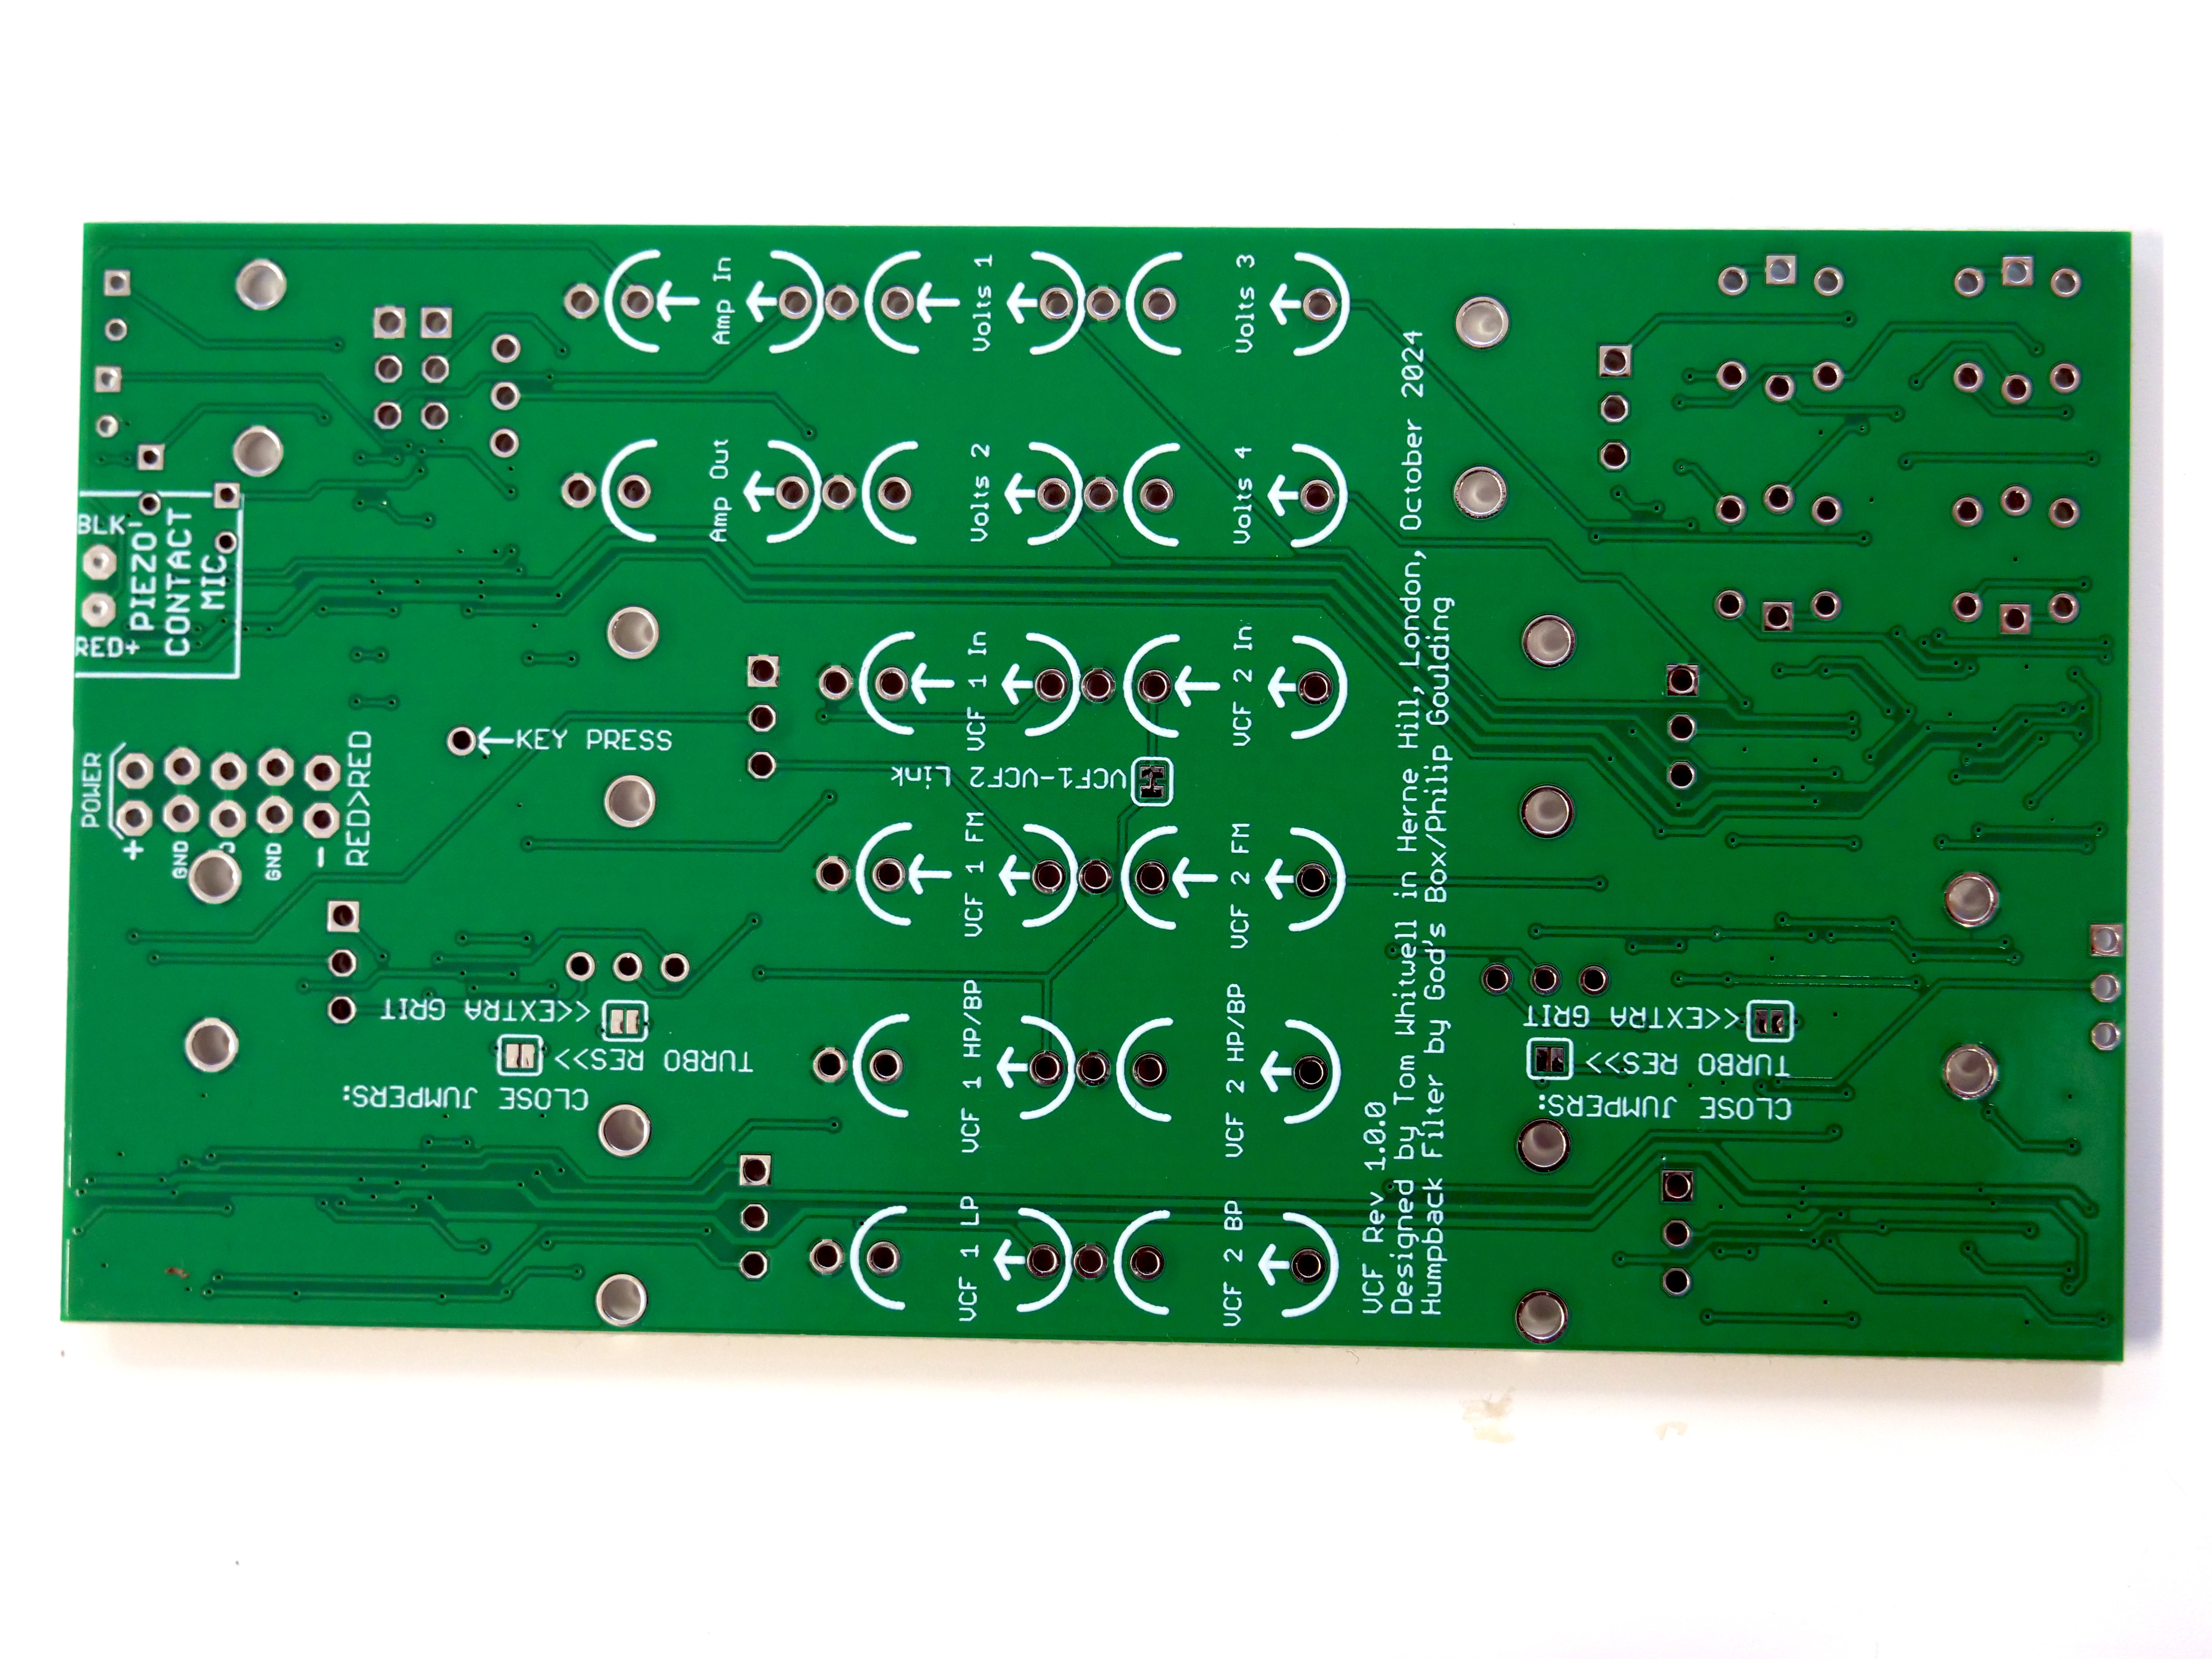
- Normalisation As you get used to the system and learn ways to use it, you may want to make permanent connections rather than using a patch cable every time. Most of the sockets have switched inputs. If you solder a connector to the switch input, the signal flows into the module unless a socked is plugged in. This is how the FM connectors on the Oscillators work. It’s easy - and reversible - to add connections to the marked connections back of the PCB. Arrows out indicate outputs, arrows in indicate inputs. Solder a wire from an output to an input, and the connection is made.
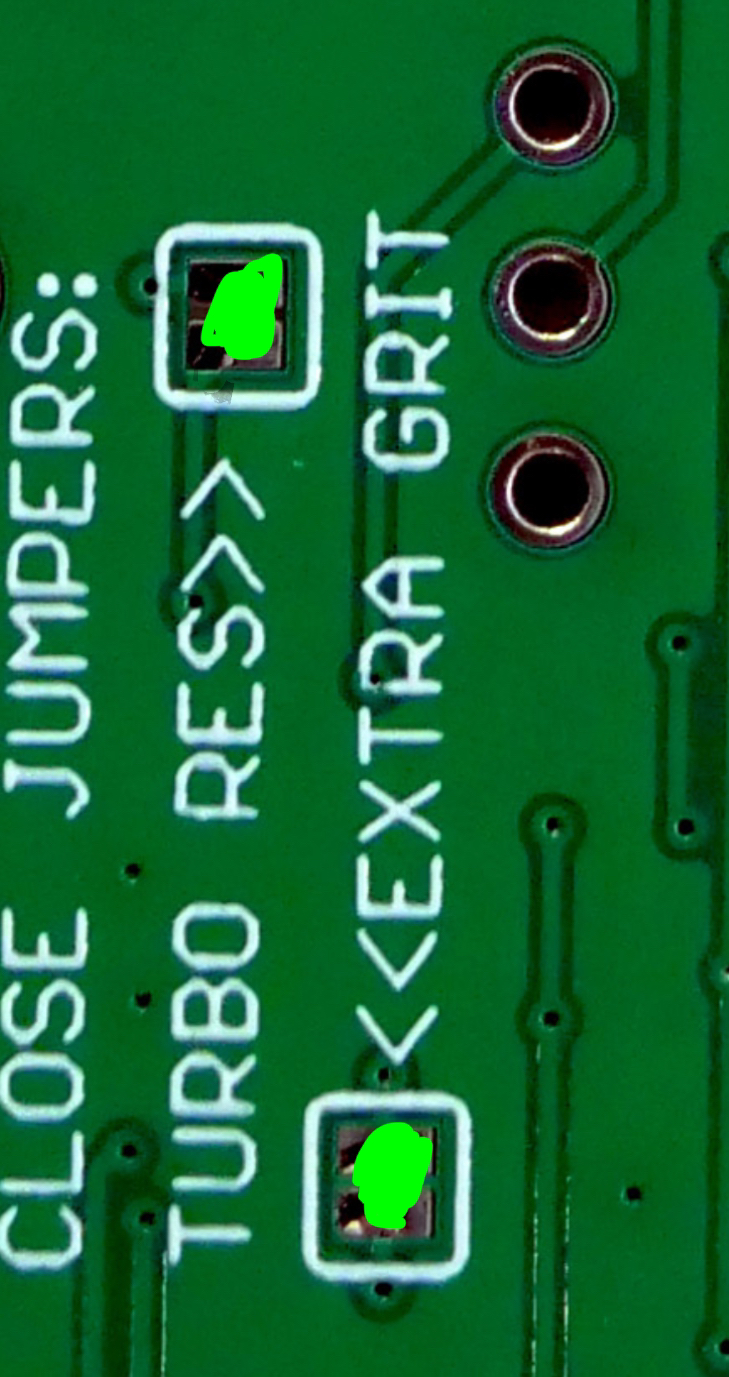
- Customisation points There are several points on the PCB where you make changes to the circuits.
- Slopes: Normally, as shown on the panel, the top slope is linear, the bottom slope is exponential. There are points on the PCB where you can close or open circuits to change this.
- Filters: The Humpbpack Filters each contain two points to make their behaviour more extreme. Close the points with solder to experiment.
- Filters: There’s a solder point you can cut to break the connection between the top filter and the bottom filter — this is useful if you want to connect the filters permanently to square wave outputs.
- Voltages: The Filter PCB also has a ‘Key Press’ point which is high when a key is pressed in Voltages. I’ve never tested this, but you might connect it to Slopes.
- Case customisation On the Power Supply board there are connectors for Switch and Power In. You can use these to add an external barrel power input and/or switch by drilling holes in the case. The connector is called JST S2B-PH-SM4-TB.